

Leave your details and our team will get in touch.
Request a call back
Tanking Membrane for Basements in Beckenham
Basement tanking membrane directs incoming water away from walls and floors to help keep the room dry.
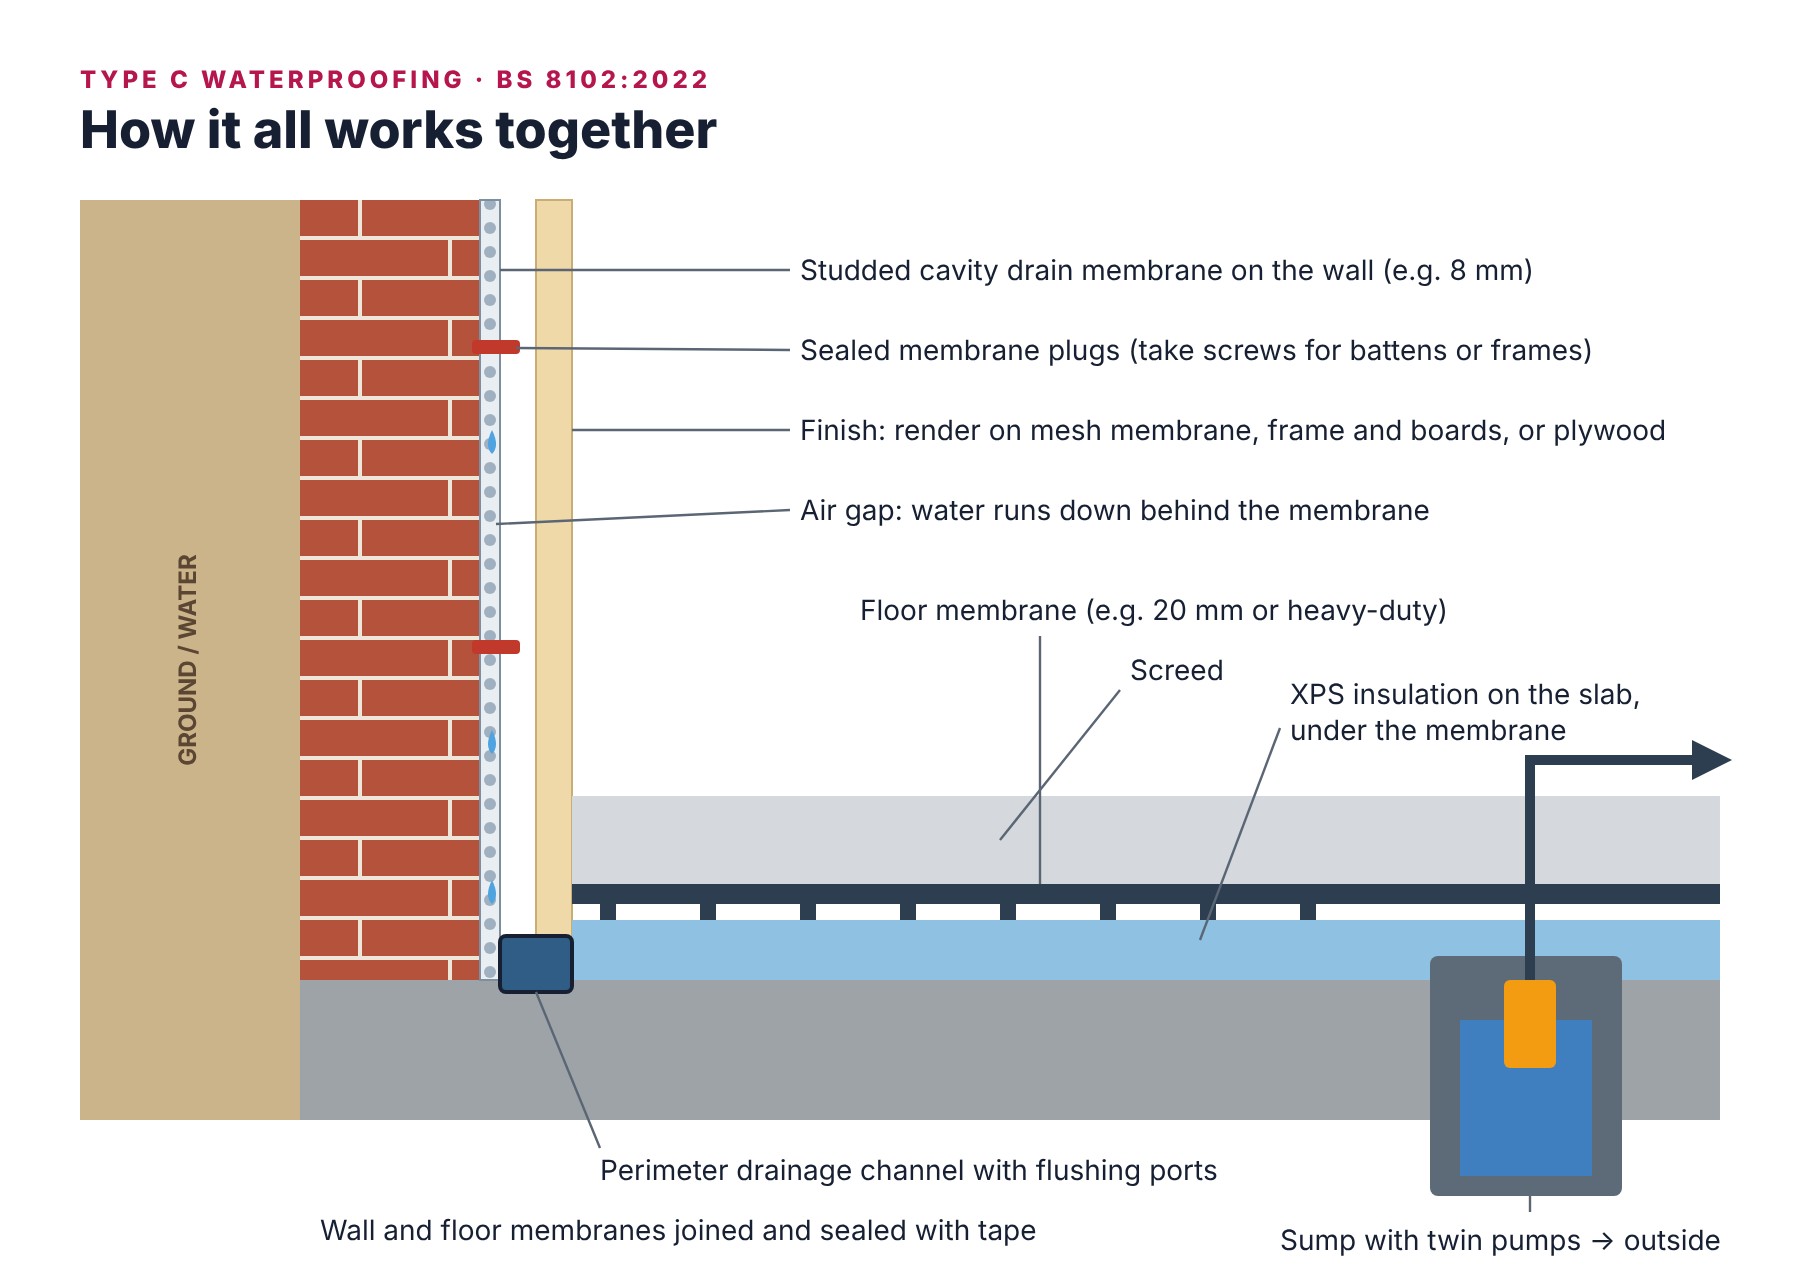
A basement tanking membrane, also called a cavity drain membrane, provides a way to manage water pressing through basement walls or floors. Rather than resisting that pressure like tanking slurry, it collects water behind the membrane and directs it to a sump pump. This is Type C waterproofing under BS 8102:2022.
In Beckenham BR3 and across London and the South East, Crystal Damp Proofing & Basements Ltd installs these systems in basements, cellars and vaults. The steps below explain the process.
The 8 installation steps
- Assessing the source of water
- Selecting a suitable system
- Getting walls and floors ready
- Installing the wall membrane
- Laying the floor membrane
- Connecting drainage and pumps
- Finishing the walls
- Handover and ongoing servicing
Step 1: Finding the source of water
Before planning the work, we establish how water is entering. We inspect walls, floors, cracks, salts and ground conditions, using moisture meters and thermal imaging.
We assess whether it is coming through the walls as penetrating damp, rising from the ground or entering through cracks caused by building movement.
Step 2
Step 2: Selecting the waterproofing system
The survey determines whether a membrane is appropriate on its own or alongside tanking (Type A + C). We may recommend this approach when:
- water is actively entering or collects on the floor after rain,
- building movement or vibration from a nearby road has caused numerous structural cracks in the walls,
- heavy salt contamination means tanking alone could blister and detach,
- Type B waterproof concrete forms the basement and its joints could crack over time,
- the planned use is a bedroom, office, gym or another living space.
Our basement tanking page explains more about choosing an approach.
Step 3: Preparing walls and floors
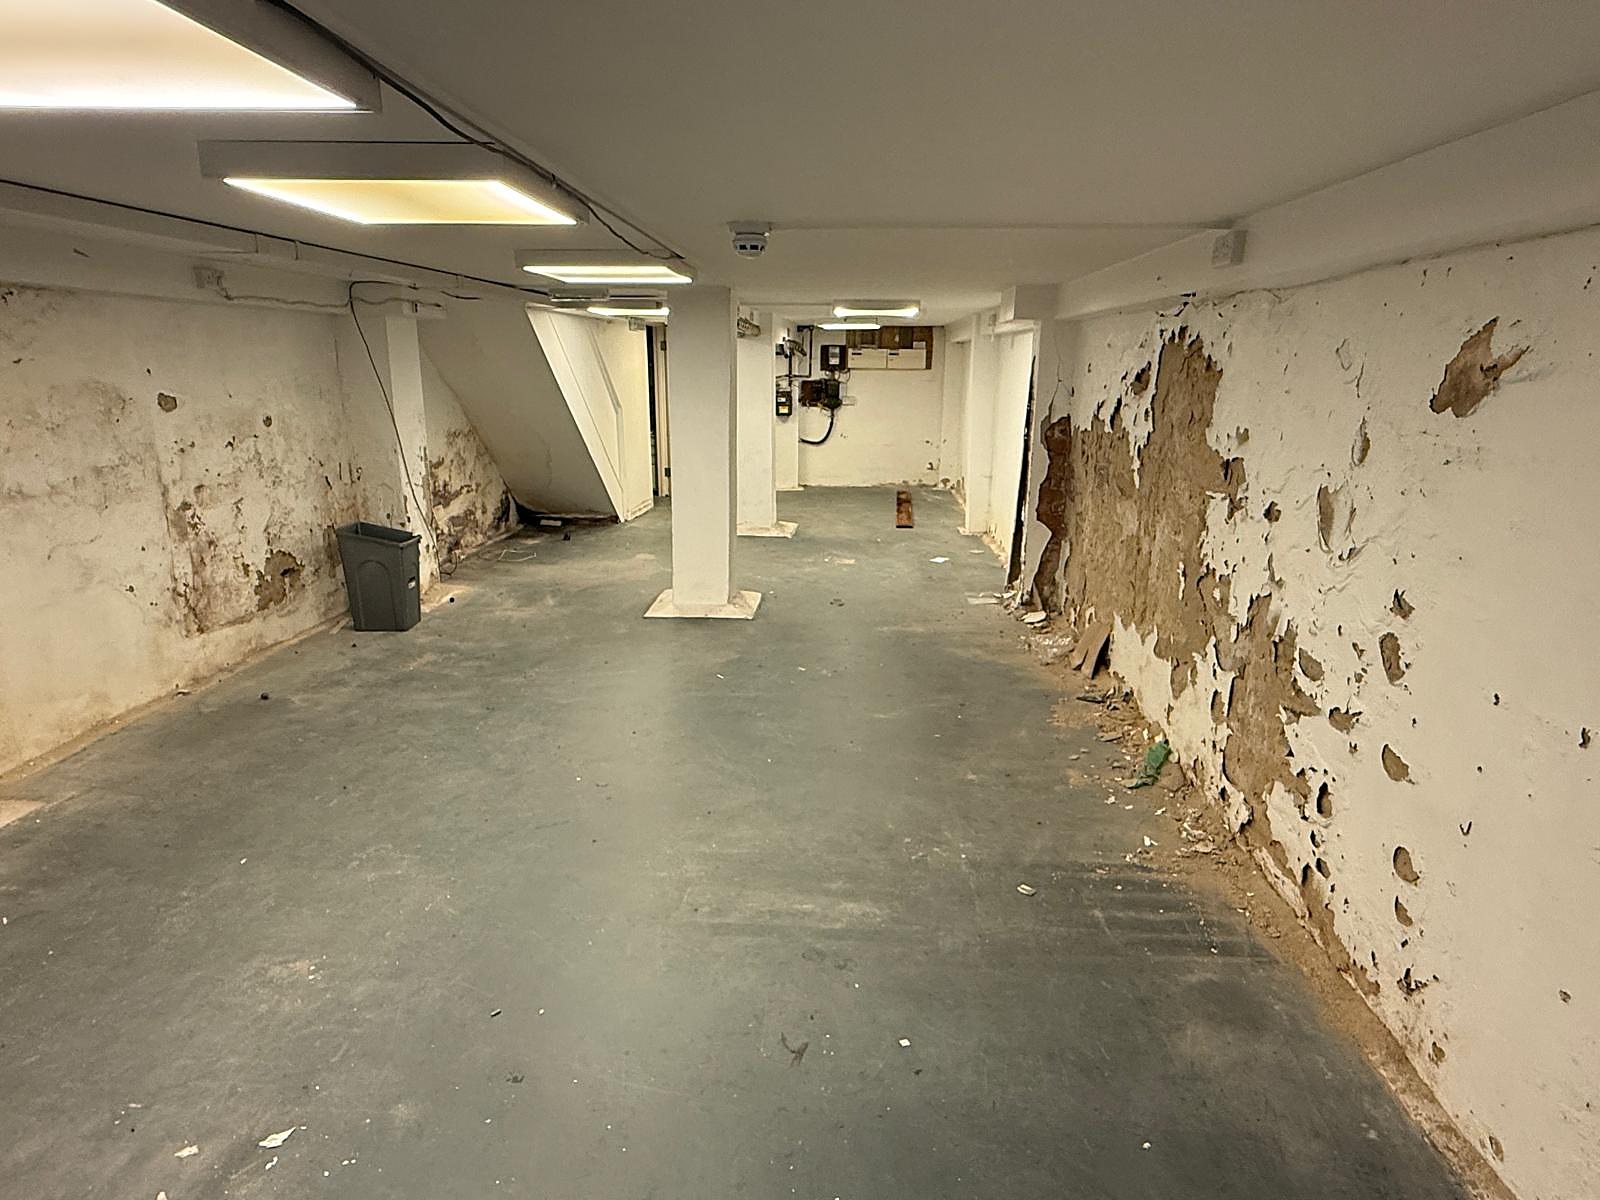
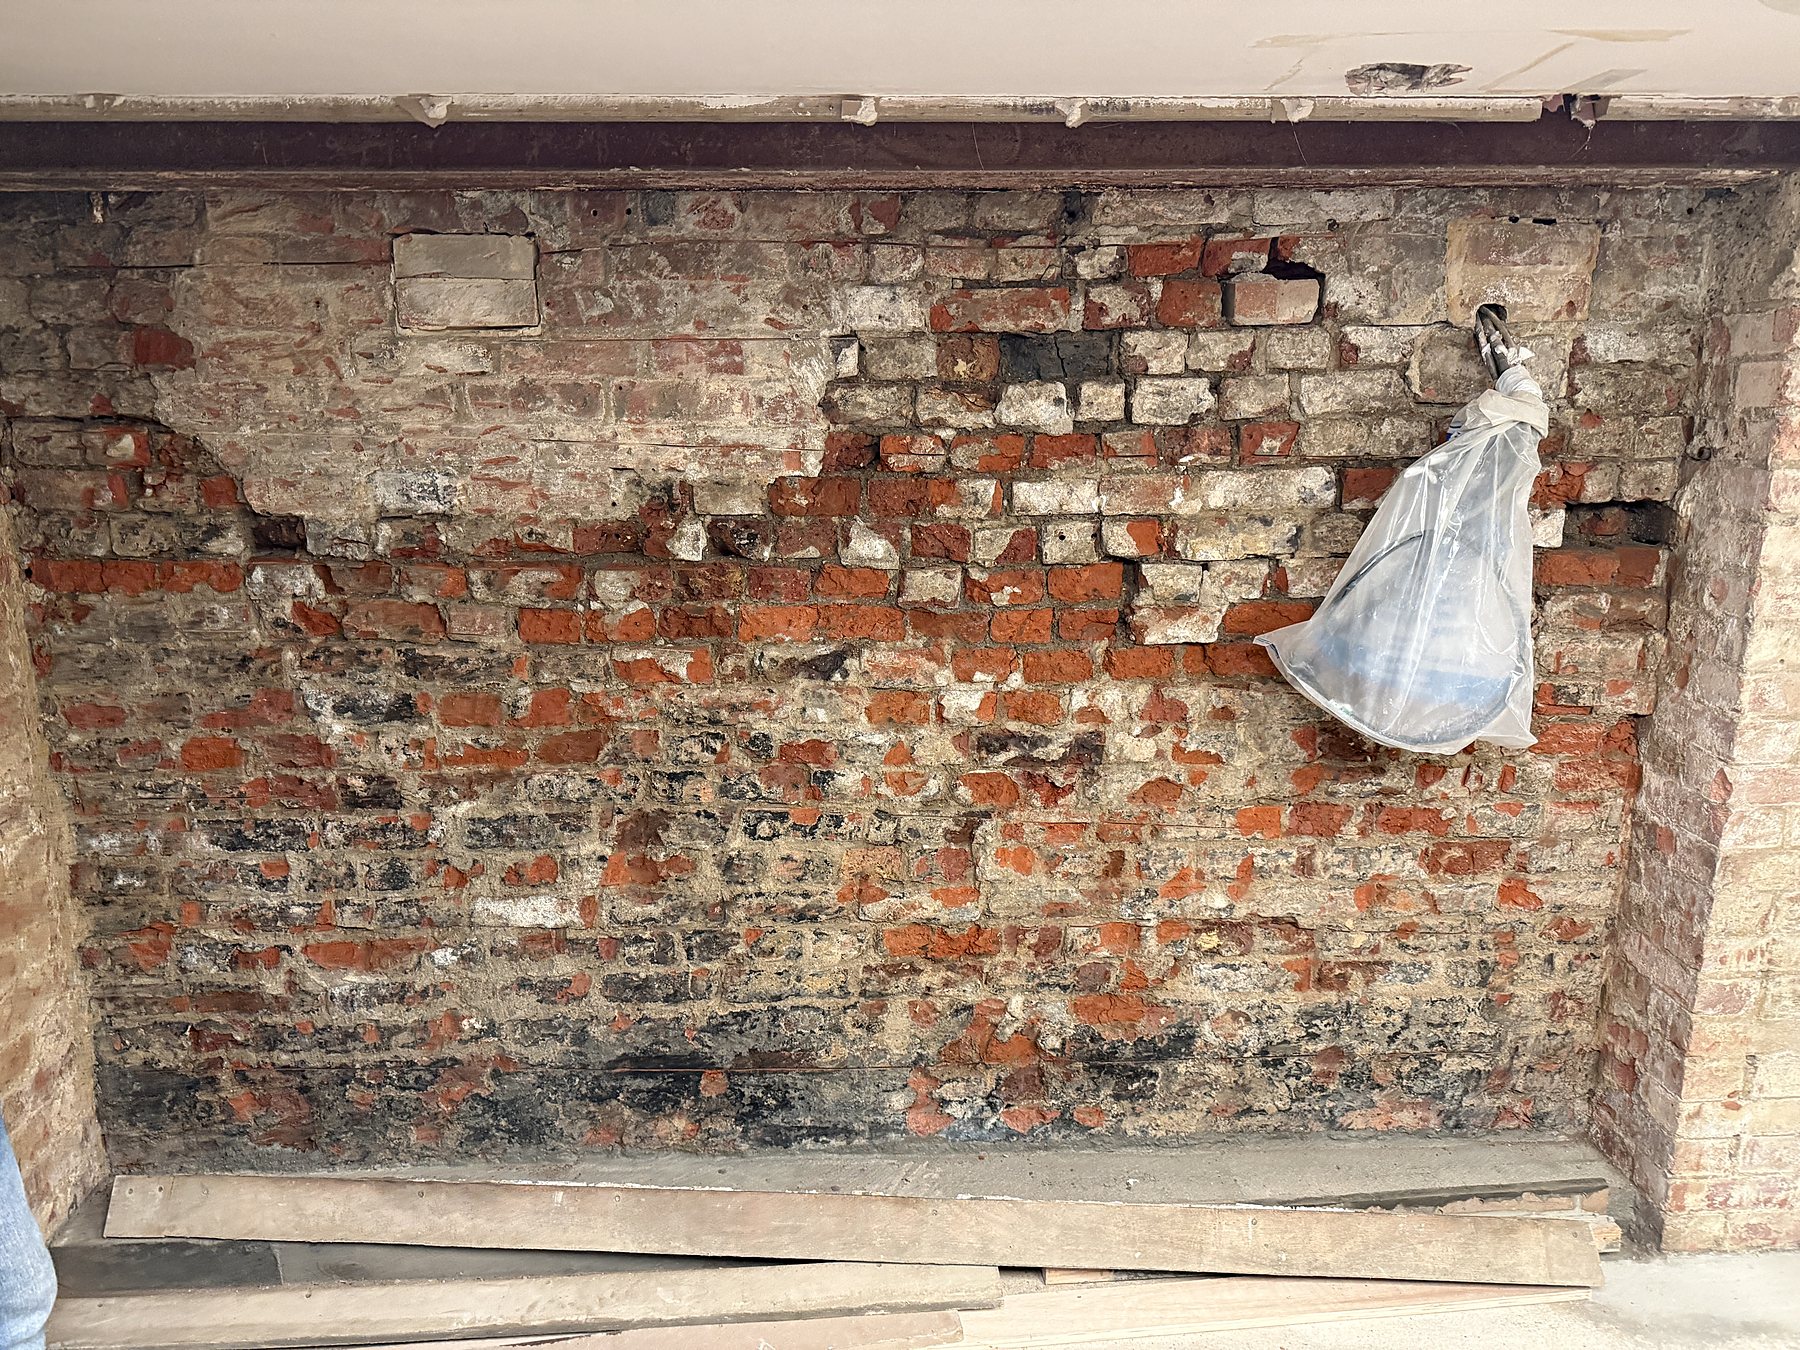
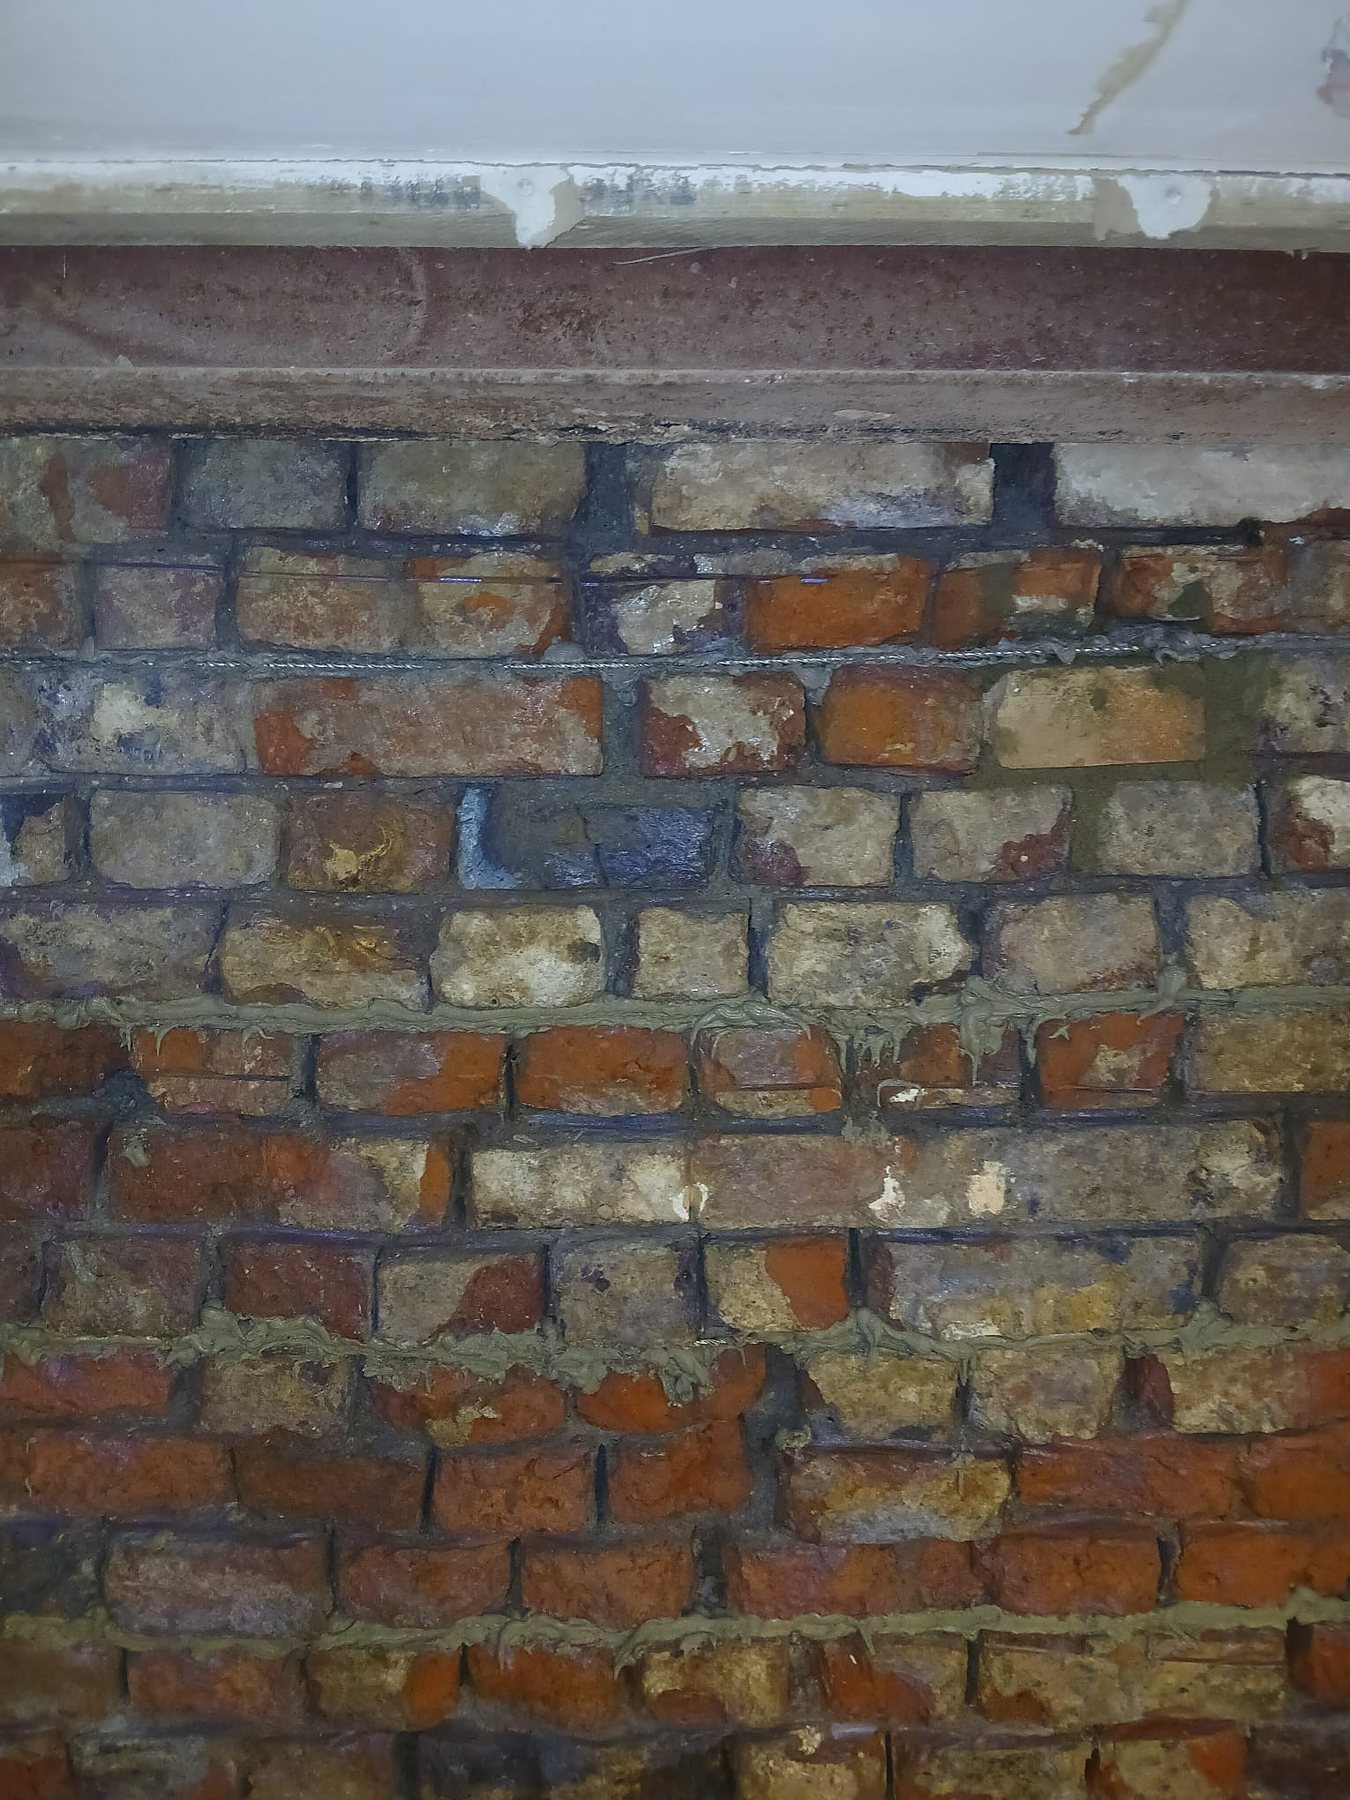
First, we remove loose or salt-affected plaster, sharp projections and unstable mortar that might puncture the membrane. Active leaks are sealed with fast-setting, expanding plugging mortar designed for water entering under pressure.
Cracked walls are repaired before installation, using methods such as helical bar crack stitching, so the membrane is fixed over a sound structure.
Treating new concrete
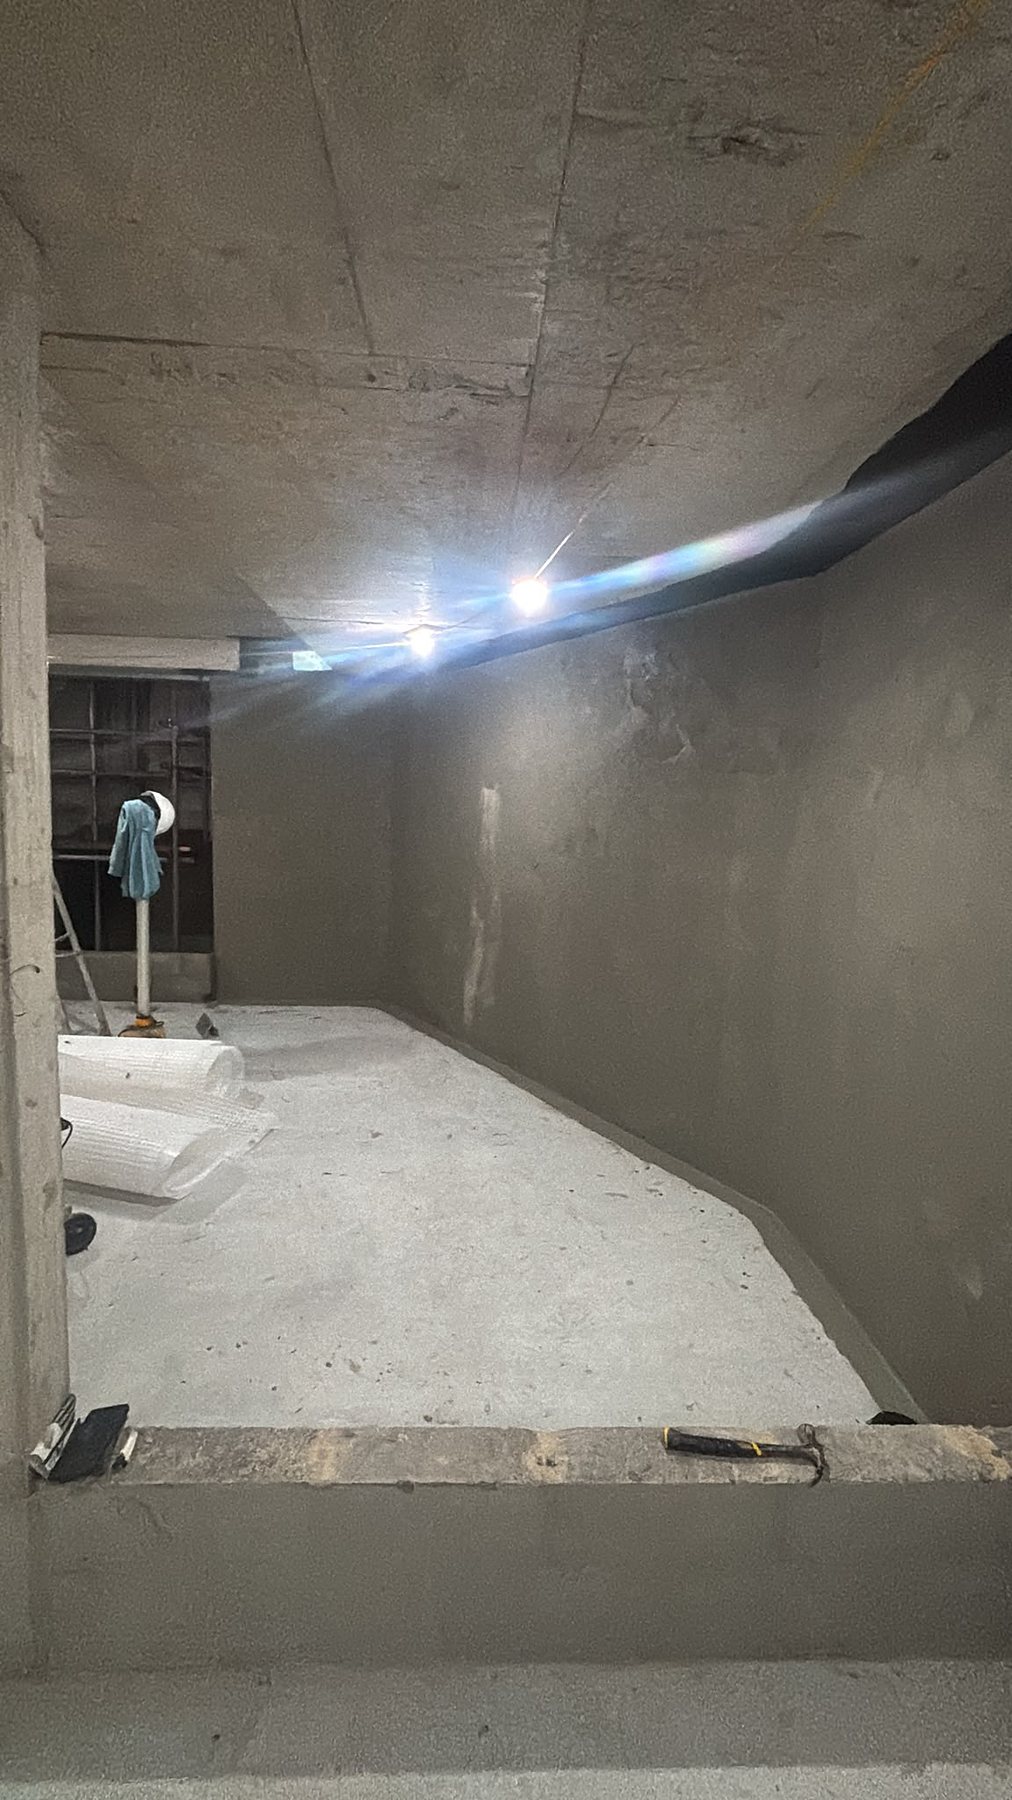
New concrete, including concrete laid after underpinning, can release free lime that accumulates in drainage channels. We apply an anti-lime sealer to all new concrete before installing the membrane.
Step 3
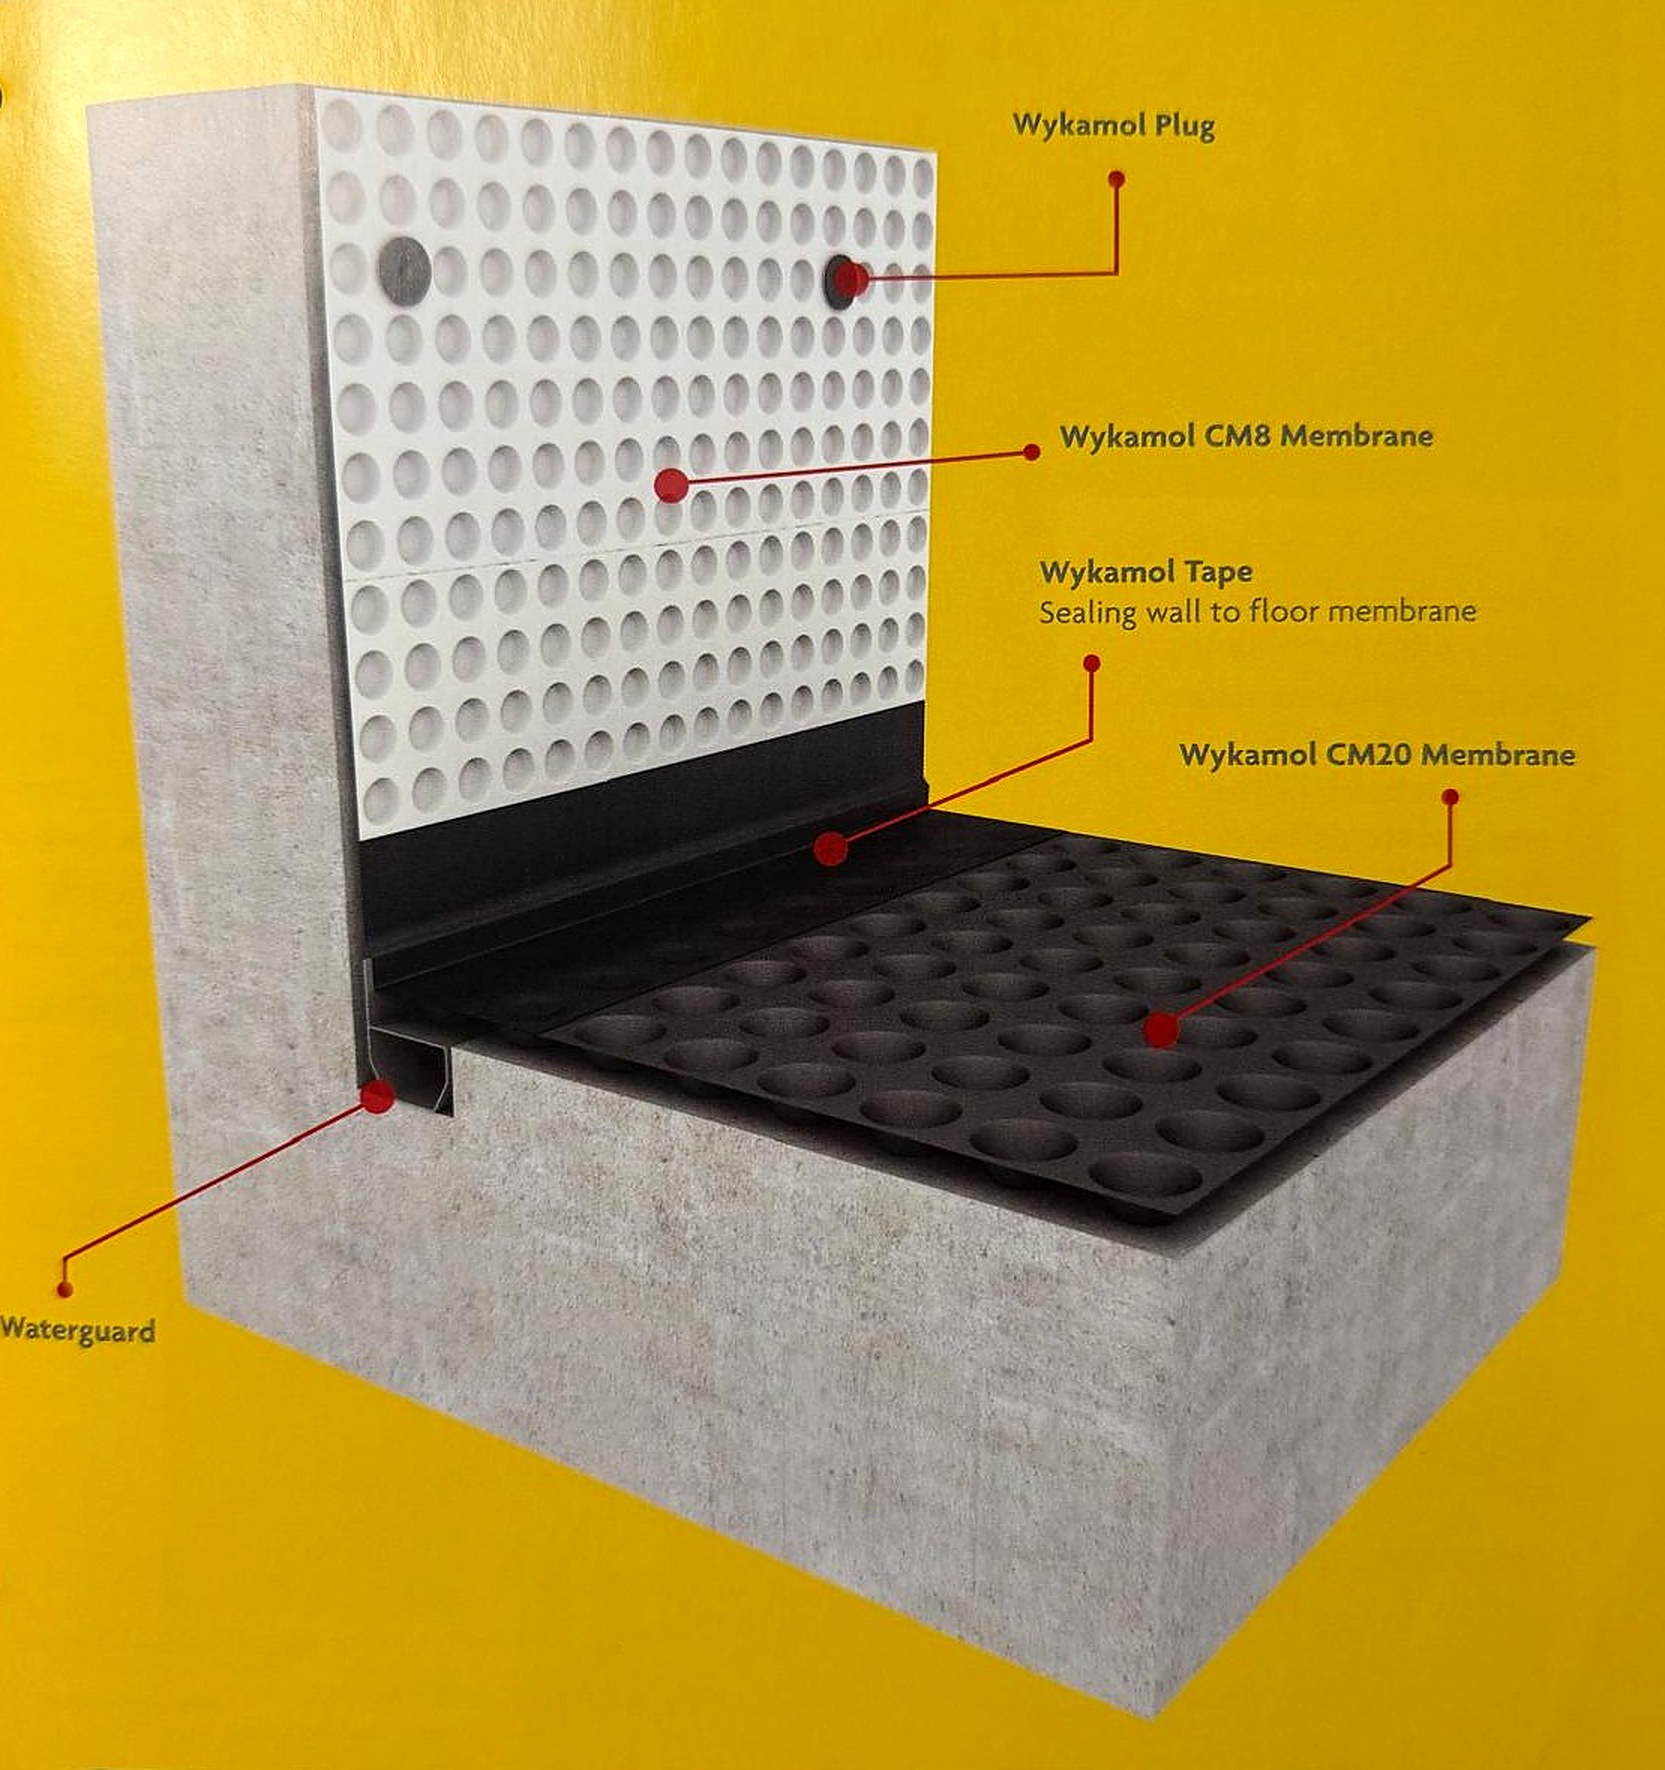
Step 4: Installing the wall membrane
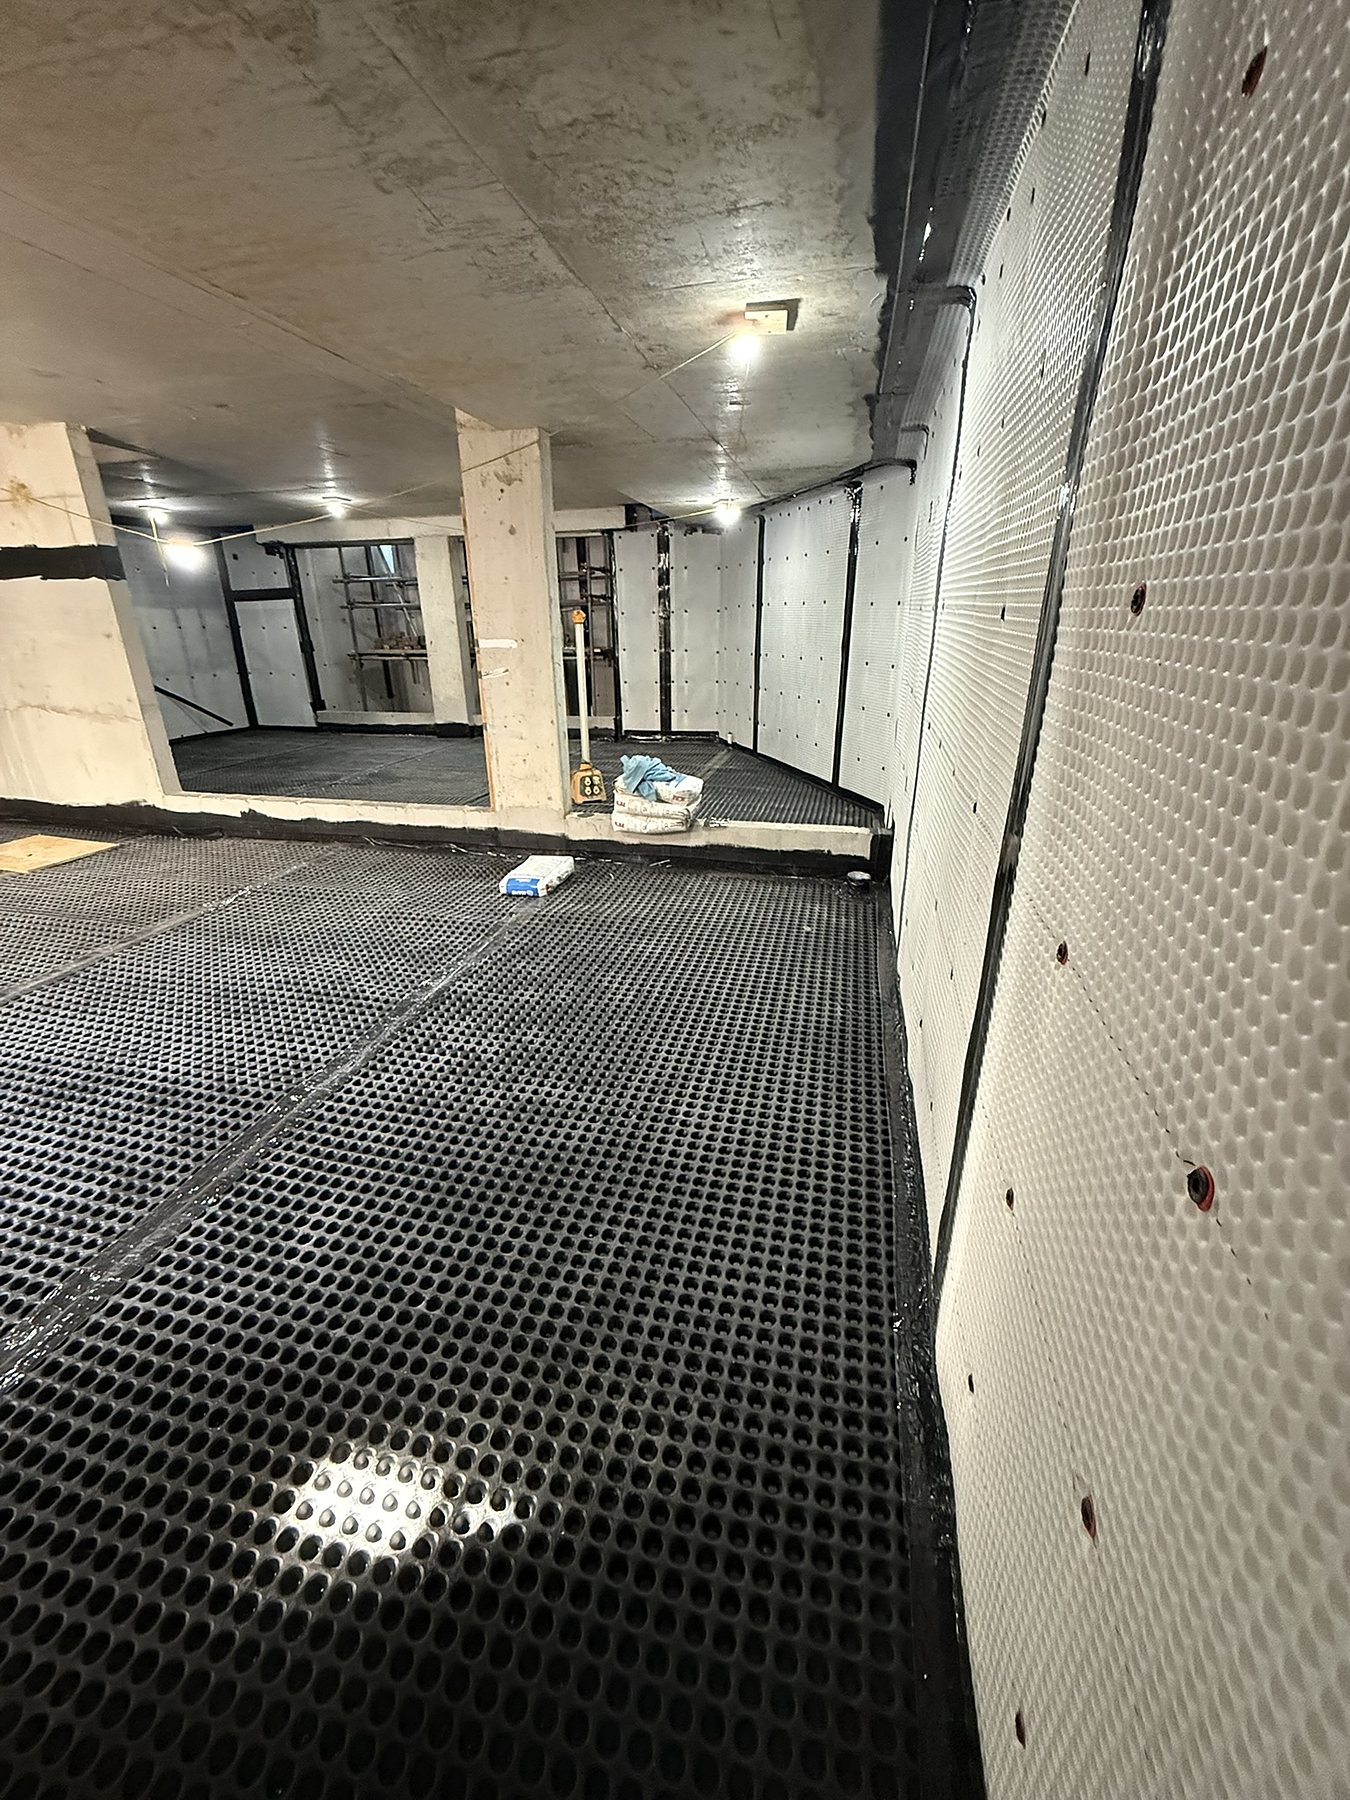
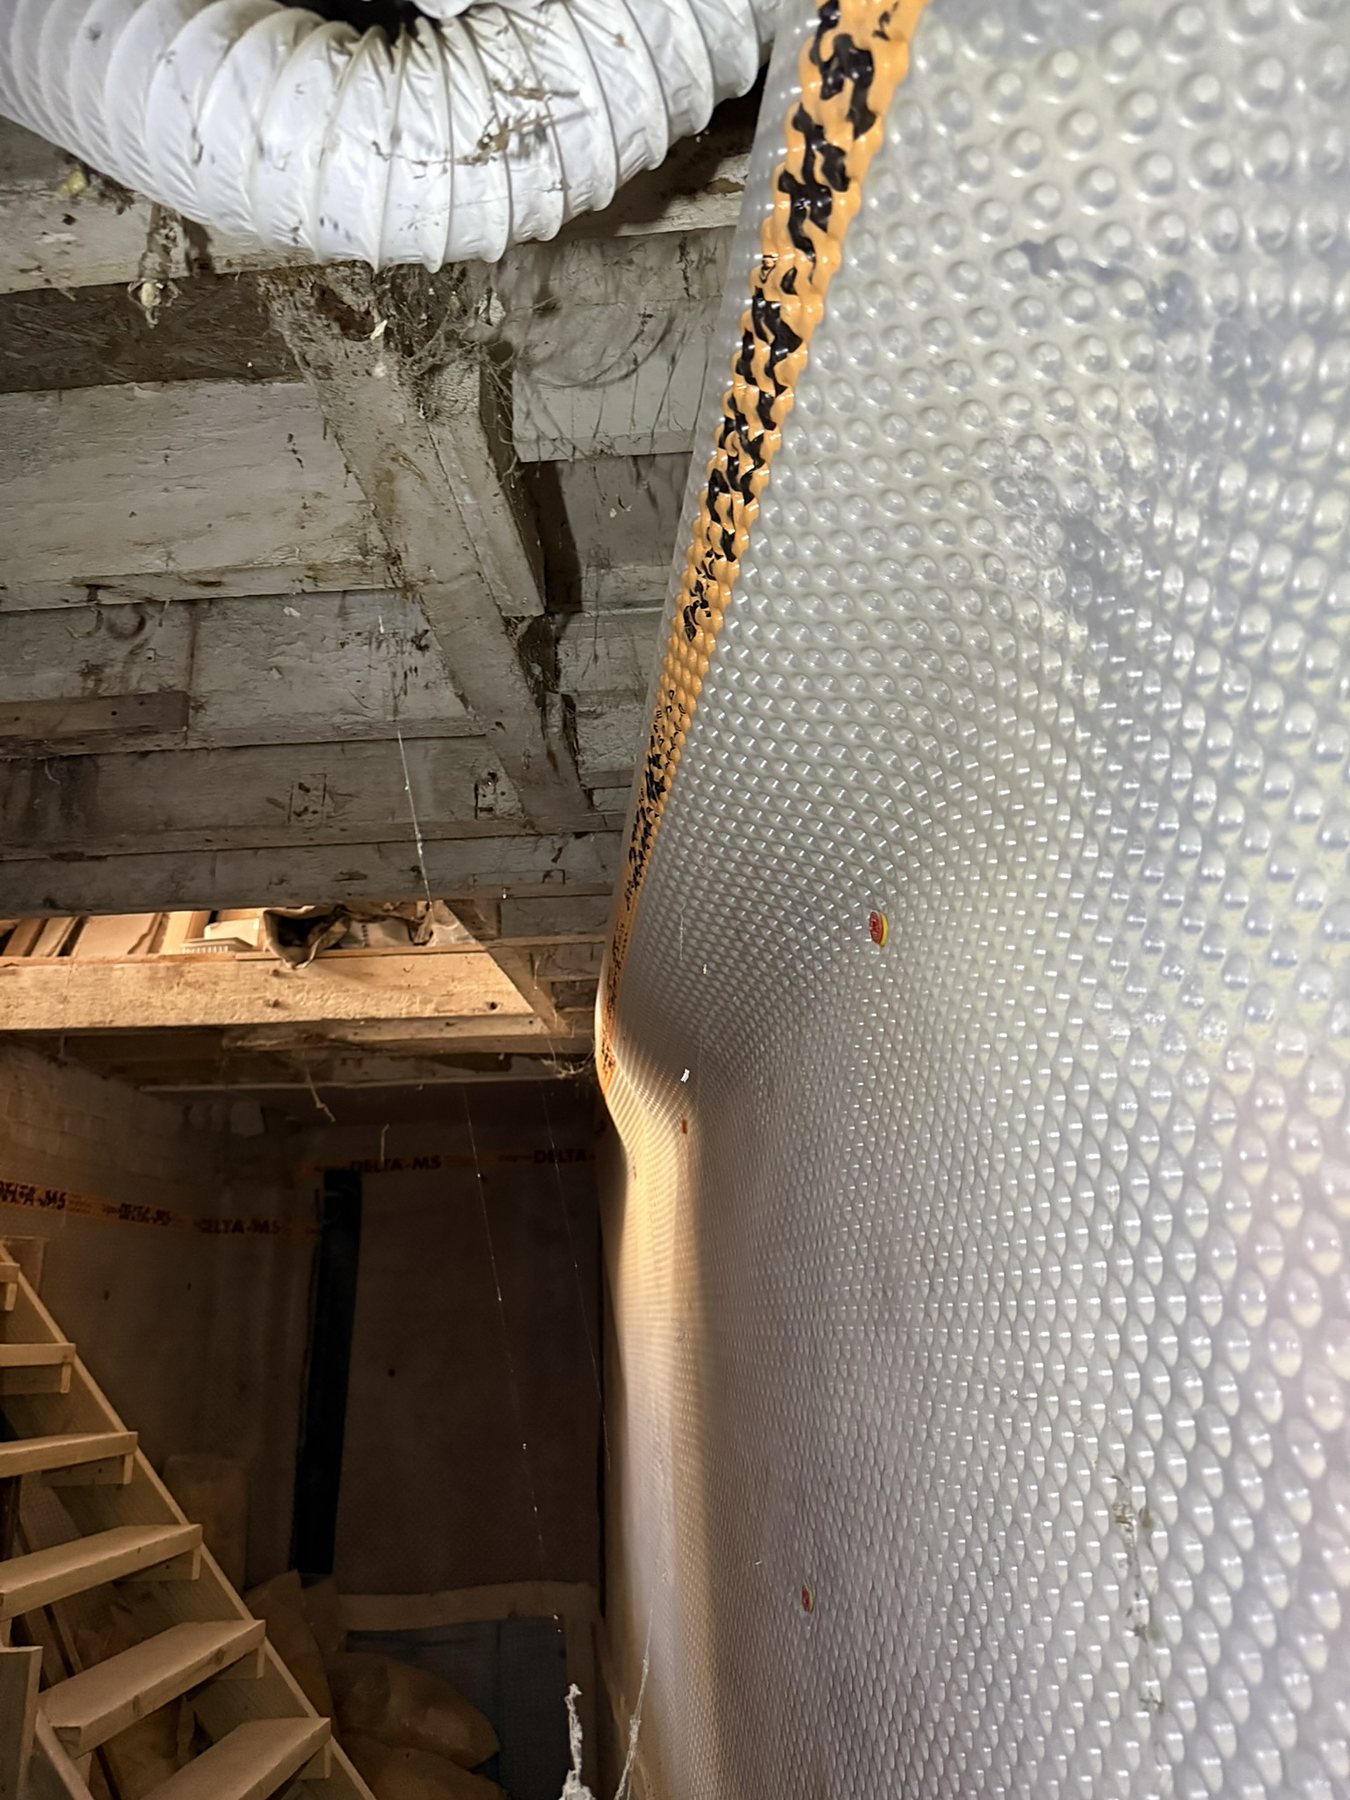
- Studded wall membrane: we position an 8 mm studded HDPE membrane with its studs towards the wall. The resulting air gap lets incoming water travel down behind it, away from the room. Its clear surface also shows us where to place fixings.
- Sealed fixings: plugs with rubber seals prevent fixing points from becoming routes for water. Brick plugs accept screws for battens or metal framing; plaster plugs have broad, serrated heads for boards or render.
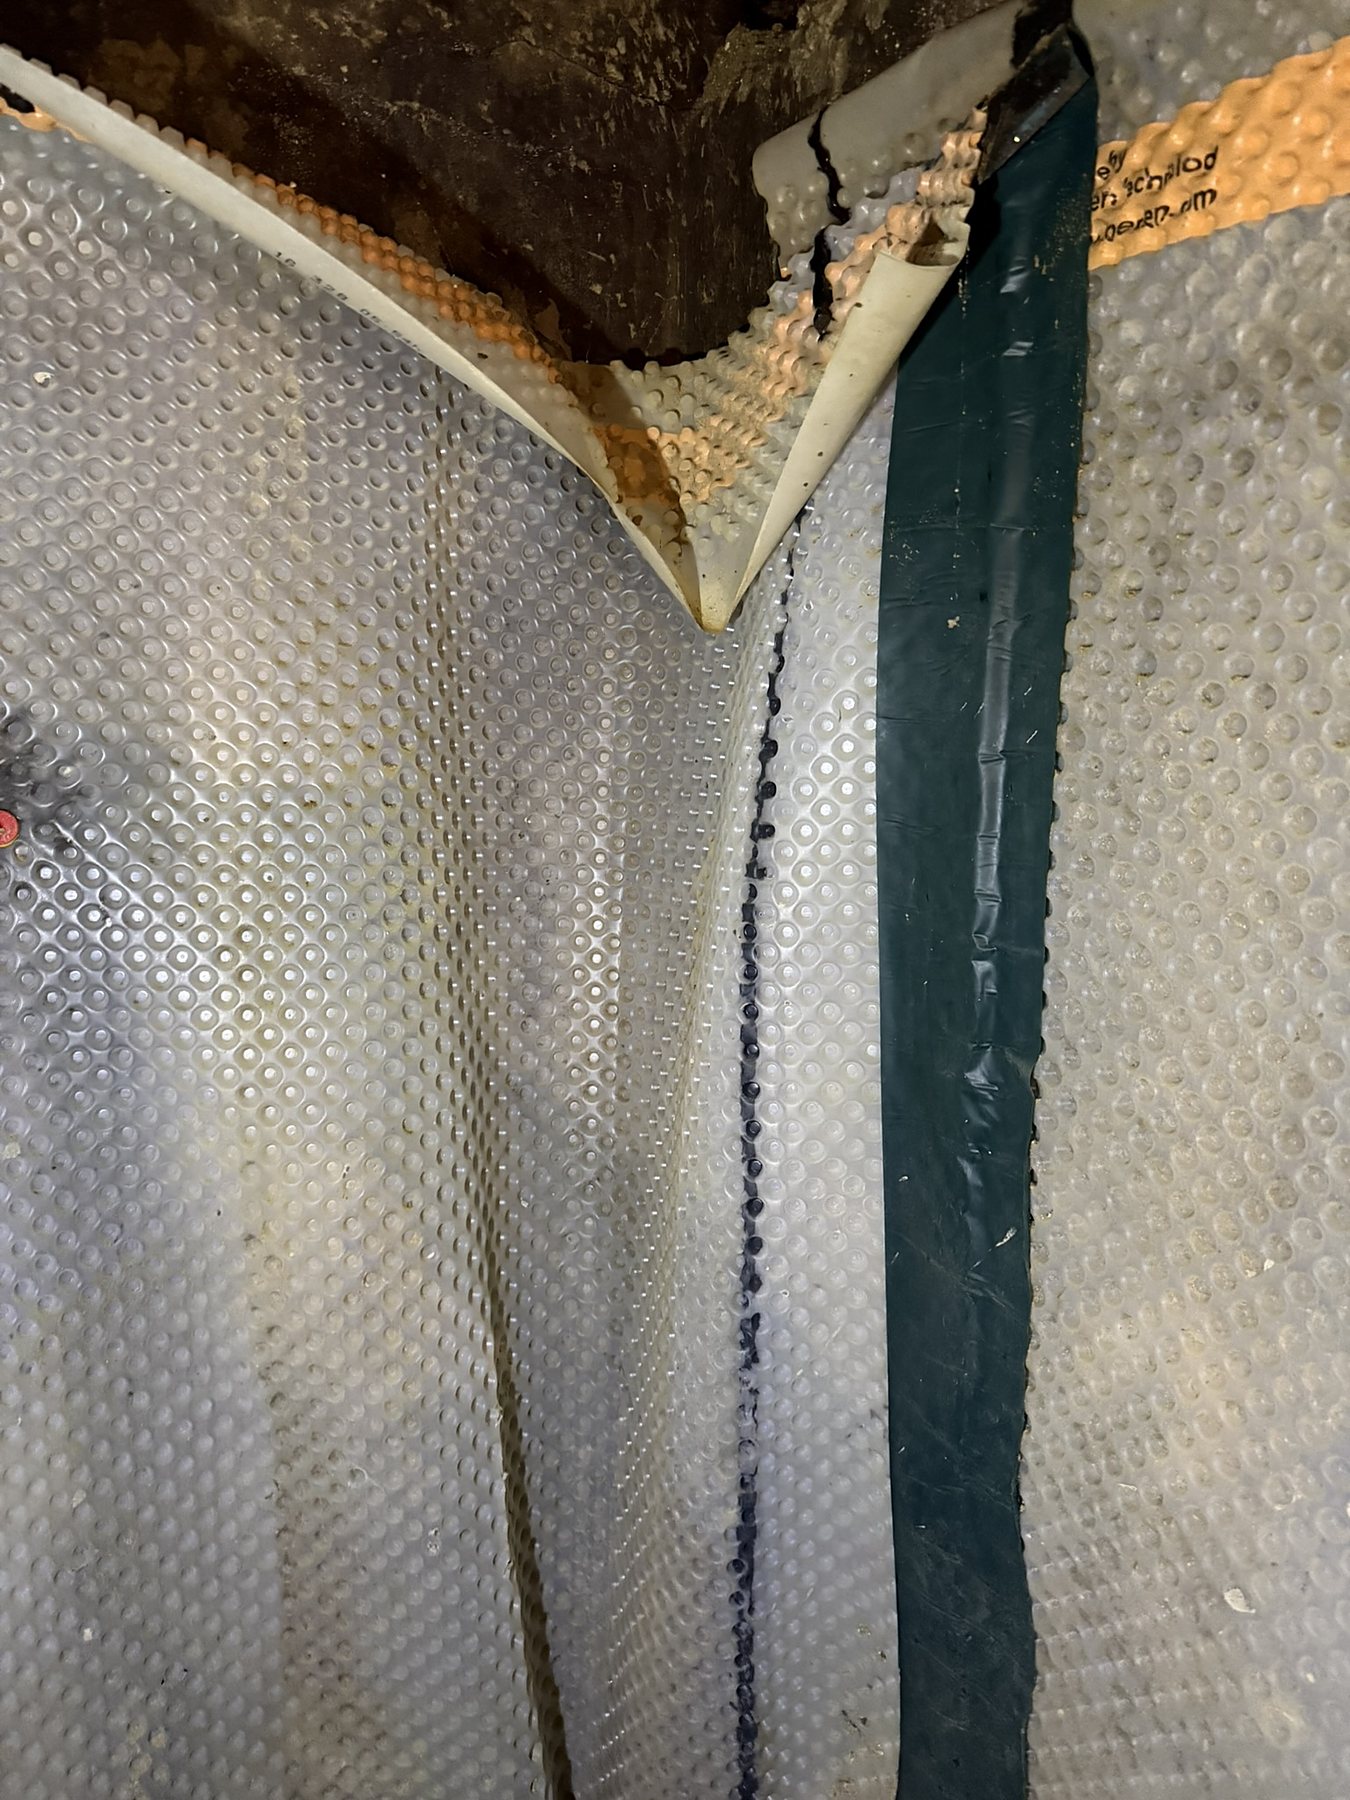
- Corners and joins: we seal overlaps with double-sided butyl tape and can seal plug heads with butyl rope. On mesh membranes, fibre-backed tape helps prevent cracks in plaster at the joints.
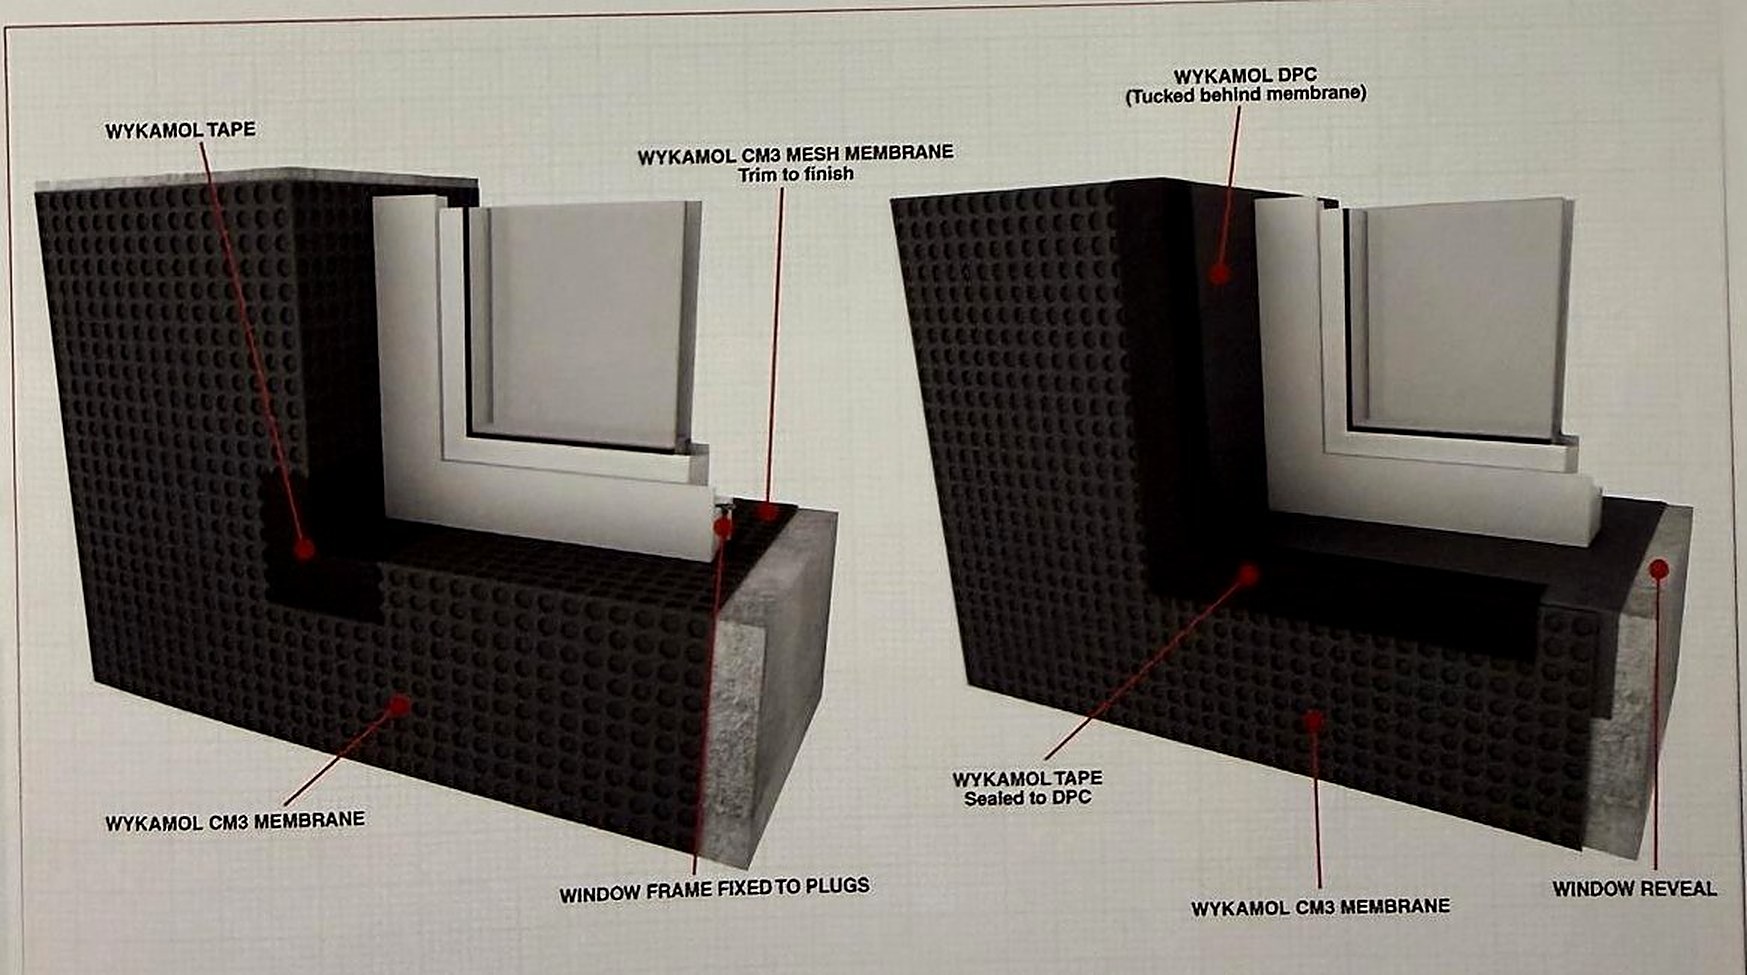
- Door and window openings: folding the membrane into each reveal and taping it closes the gap beside the frame.
Drawing: wall membrane fixed with sealed plugs and taped to the floor membrane above a drainage channel. © Wykamol Group
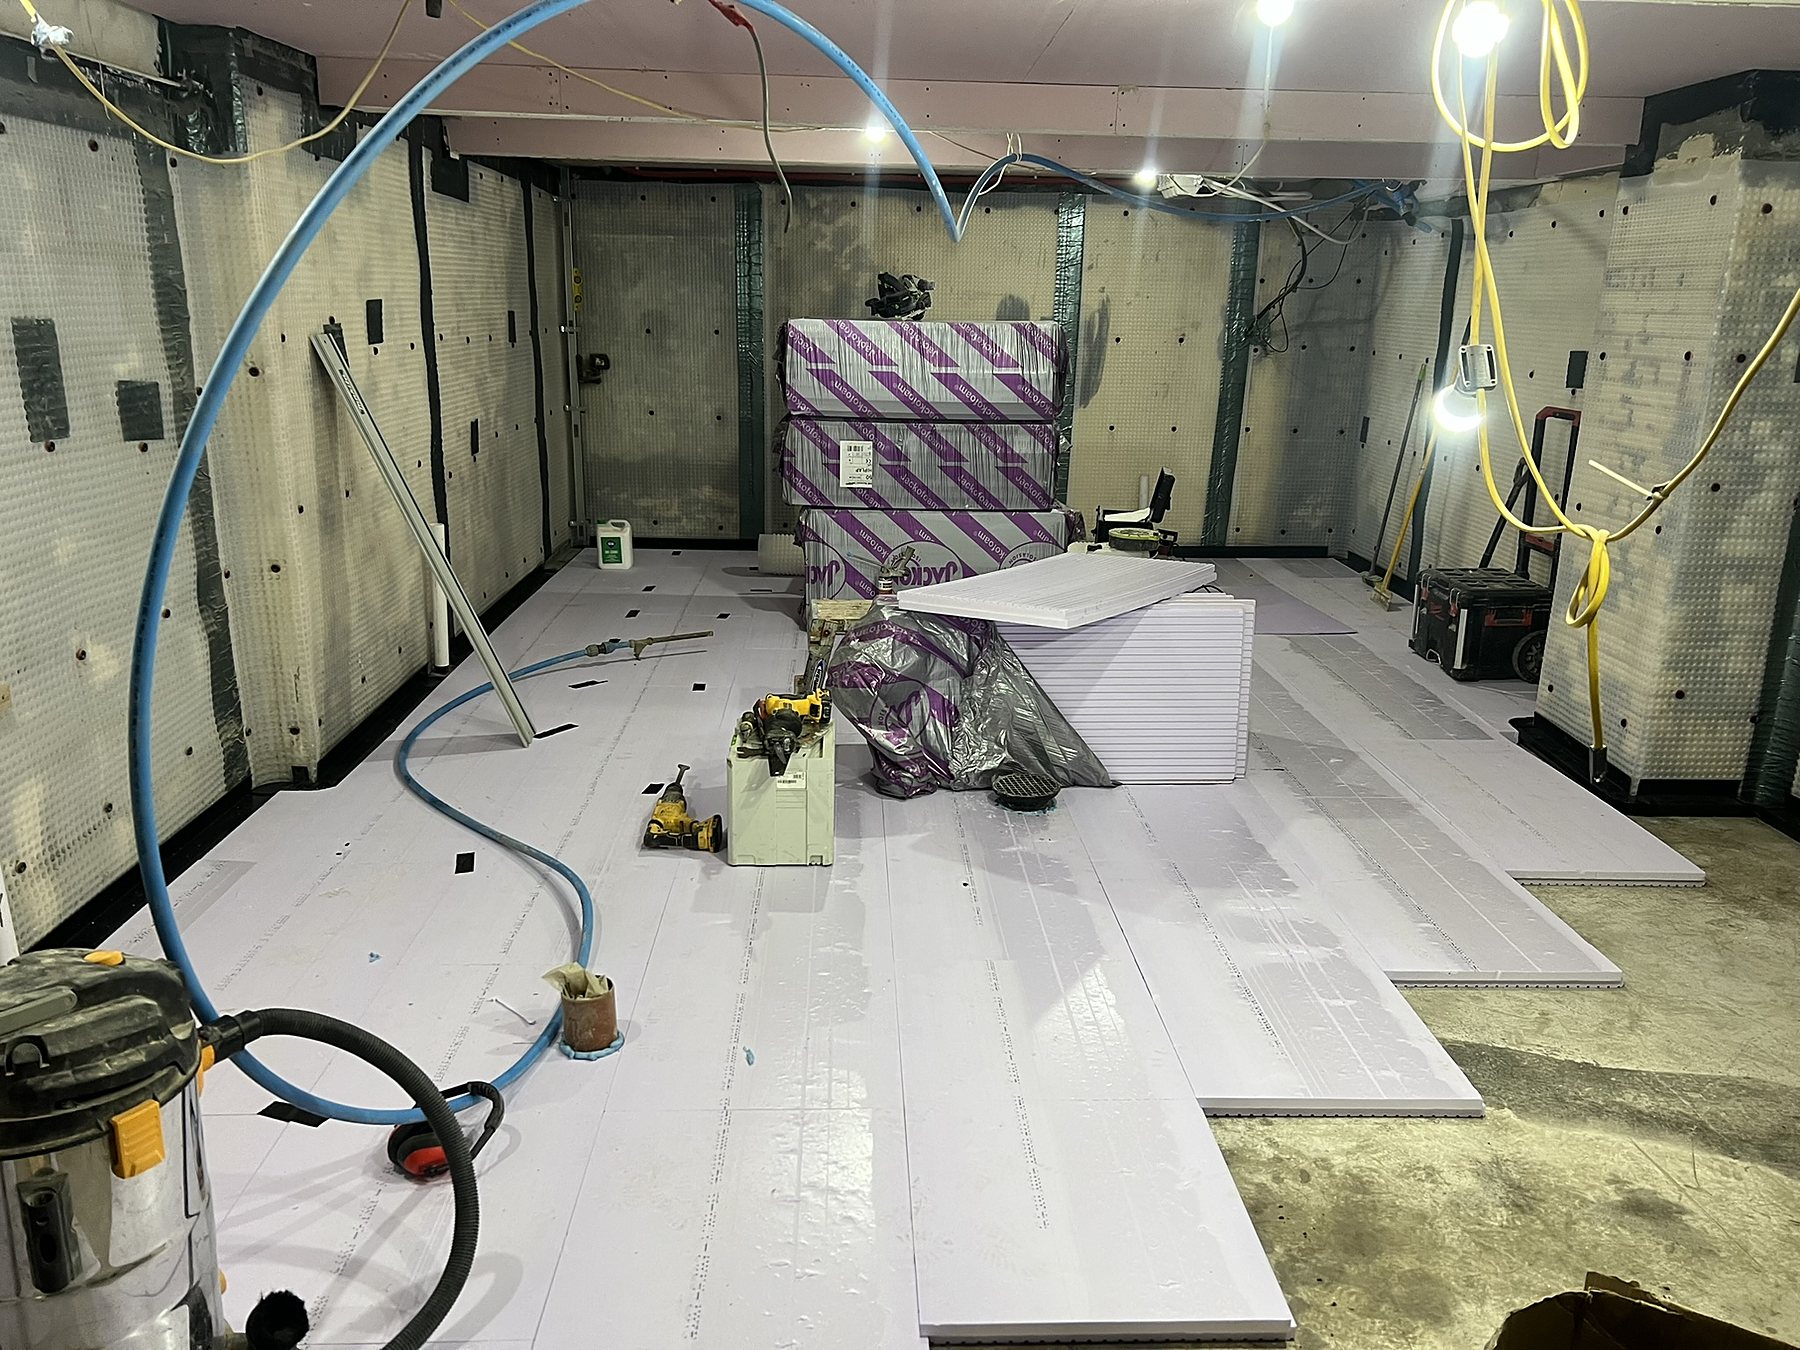
Step 5: Laying the floor membrane
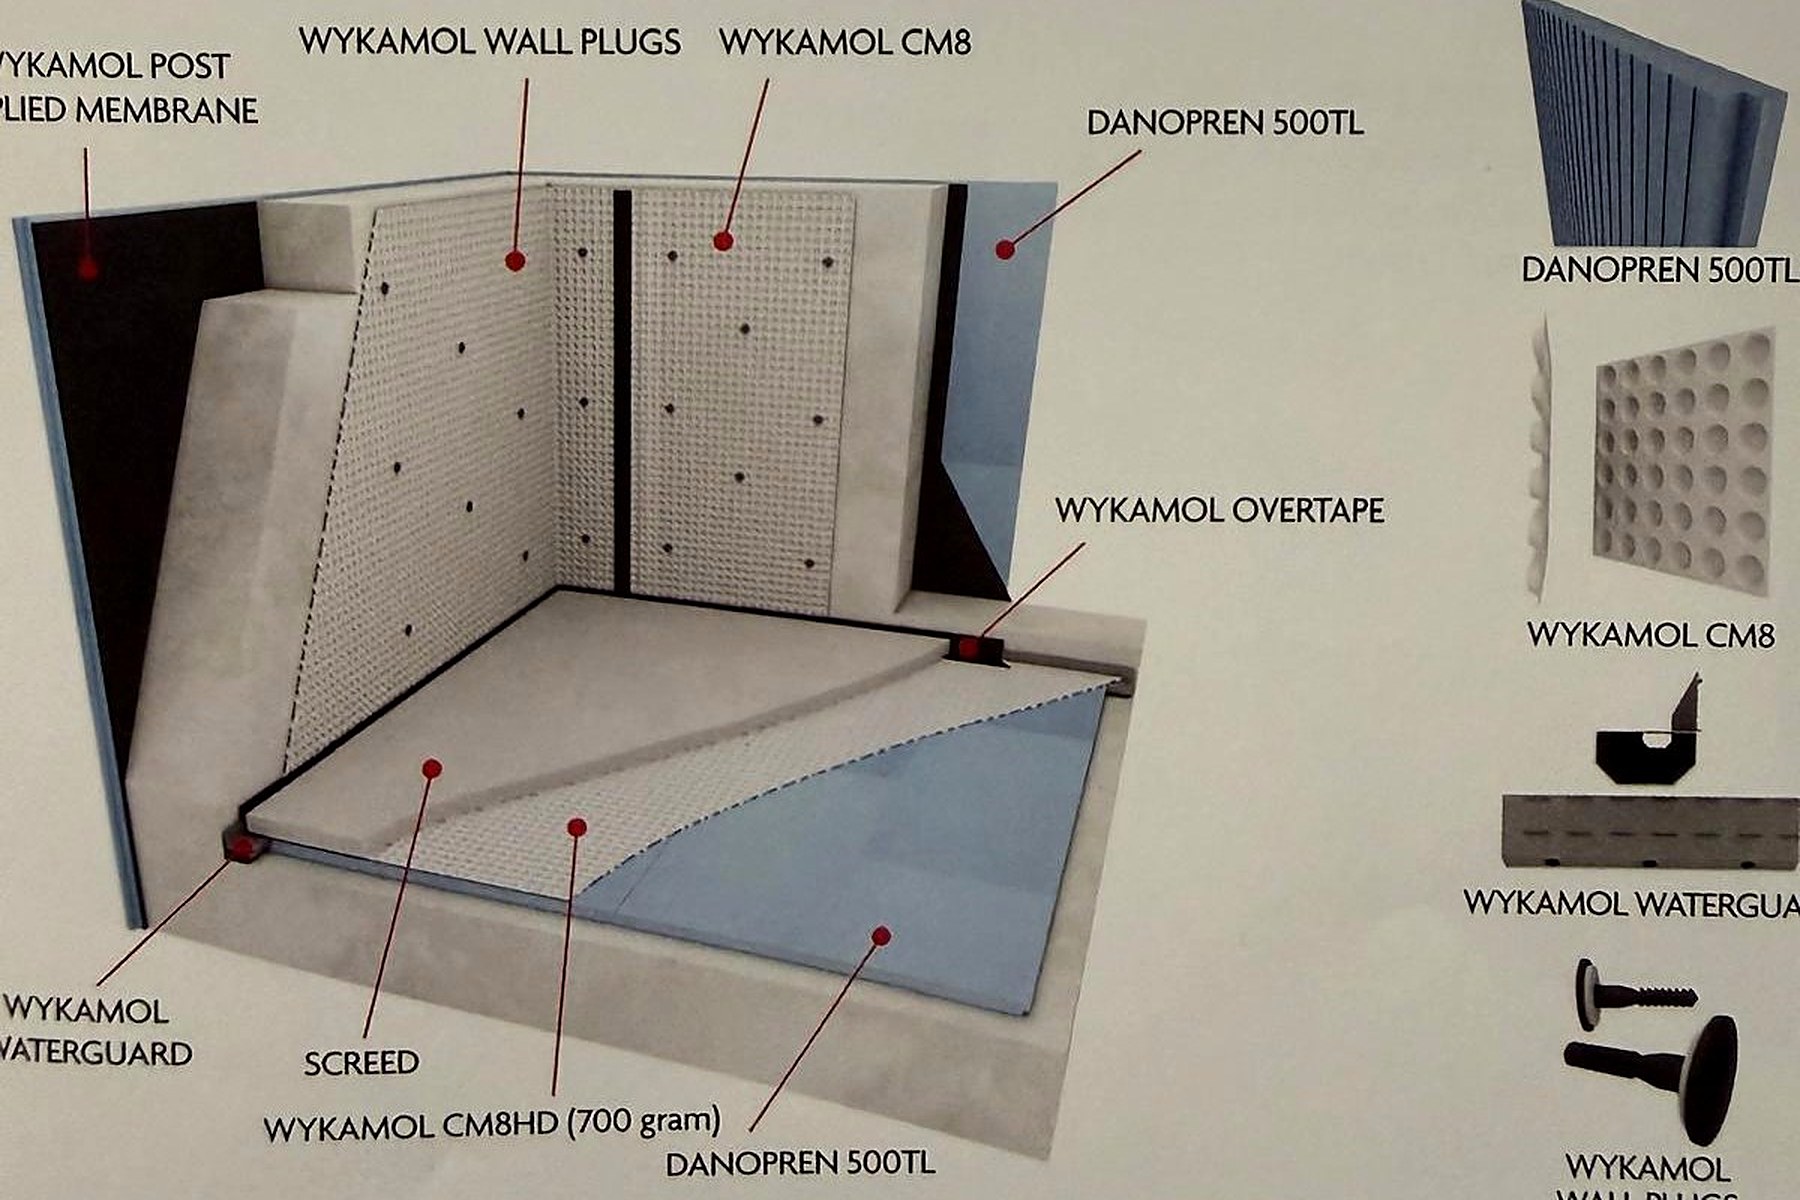
For the floor, we select a membrane capable of supporting screed and normal use:
- 20 mm floor membrane: offers the greatest drainage capacity, with a water void of around 14 litres per m², where substantial water enters through the floor.
- Heavy-duty 8 mm membrane (700 g): goes over floor insulation where greater impact resistance is required. It also provides a barrier to radon gas.
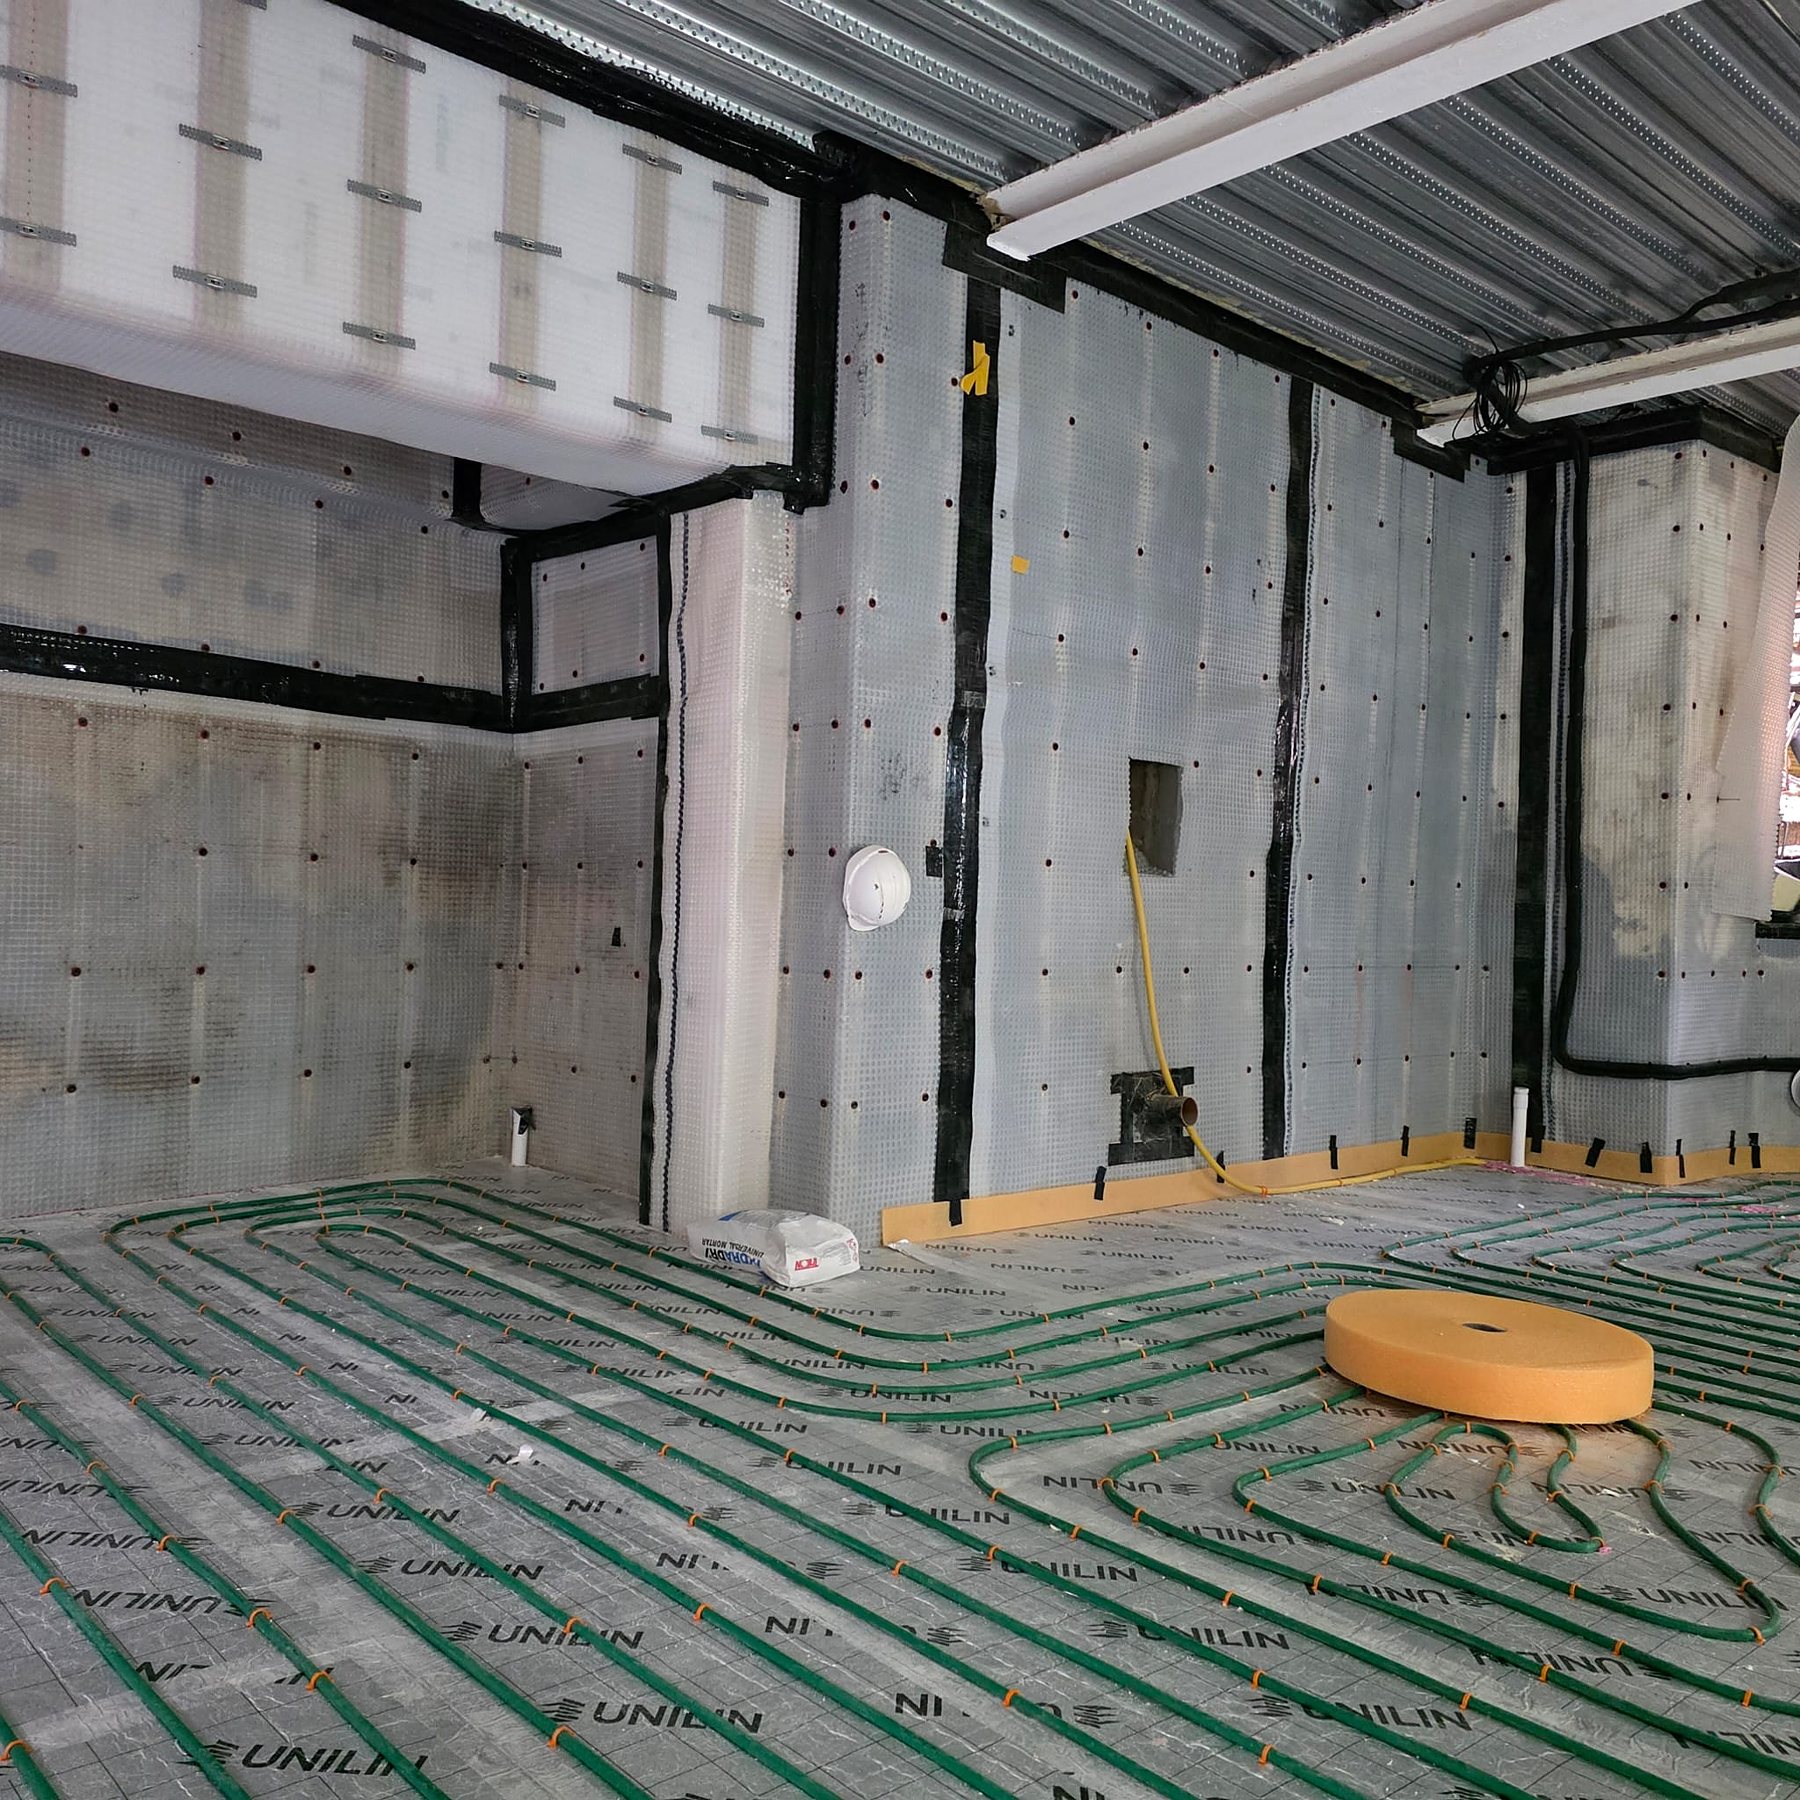
We place XPS insulation on the concrete slab beneath the membrane to help make the finished floor warm and dry. Wide corner tape joins the floor and wall membranes and seals them to the drainage channels.
Drawing: insulated floor build-up beneath a heavy-duty membrane and screed. © Wykamol Group
Step 6
Step 6: Directing water to the sump
Drainage channels take water from behind the membrane to a sealed sump, where a pump sends it outside. Find out more about our sump pump systems.
For living spaces: we fit twin pumps, a high-water alarm and battery back-up to help keep the basement dry during a storm-related power cut.
Step 7
Step 7: Choosing a wall finish
The intended use of the room guides the wall finish:
- Render over mesh membrane: an 8 mm or 3 mm membrane with welded-on mesh can receive waterproof render directly or plasterboard fixed with adhesive dabs. This is our usual approach in vaults.
- Boards on a frame: for living spaces, we attach an independent metal frame to sealed plugs and add insulation and moisture-resistant boards.
- Battens and plywood: this gives shelves a solid fixing surface and is often used in cellars. Screws secure the battens to sealed brick plugs without penetrating the membrane.
- Slim 3 mm membrane: suited to restricted areas, including window reveals.
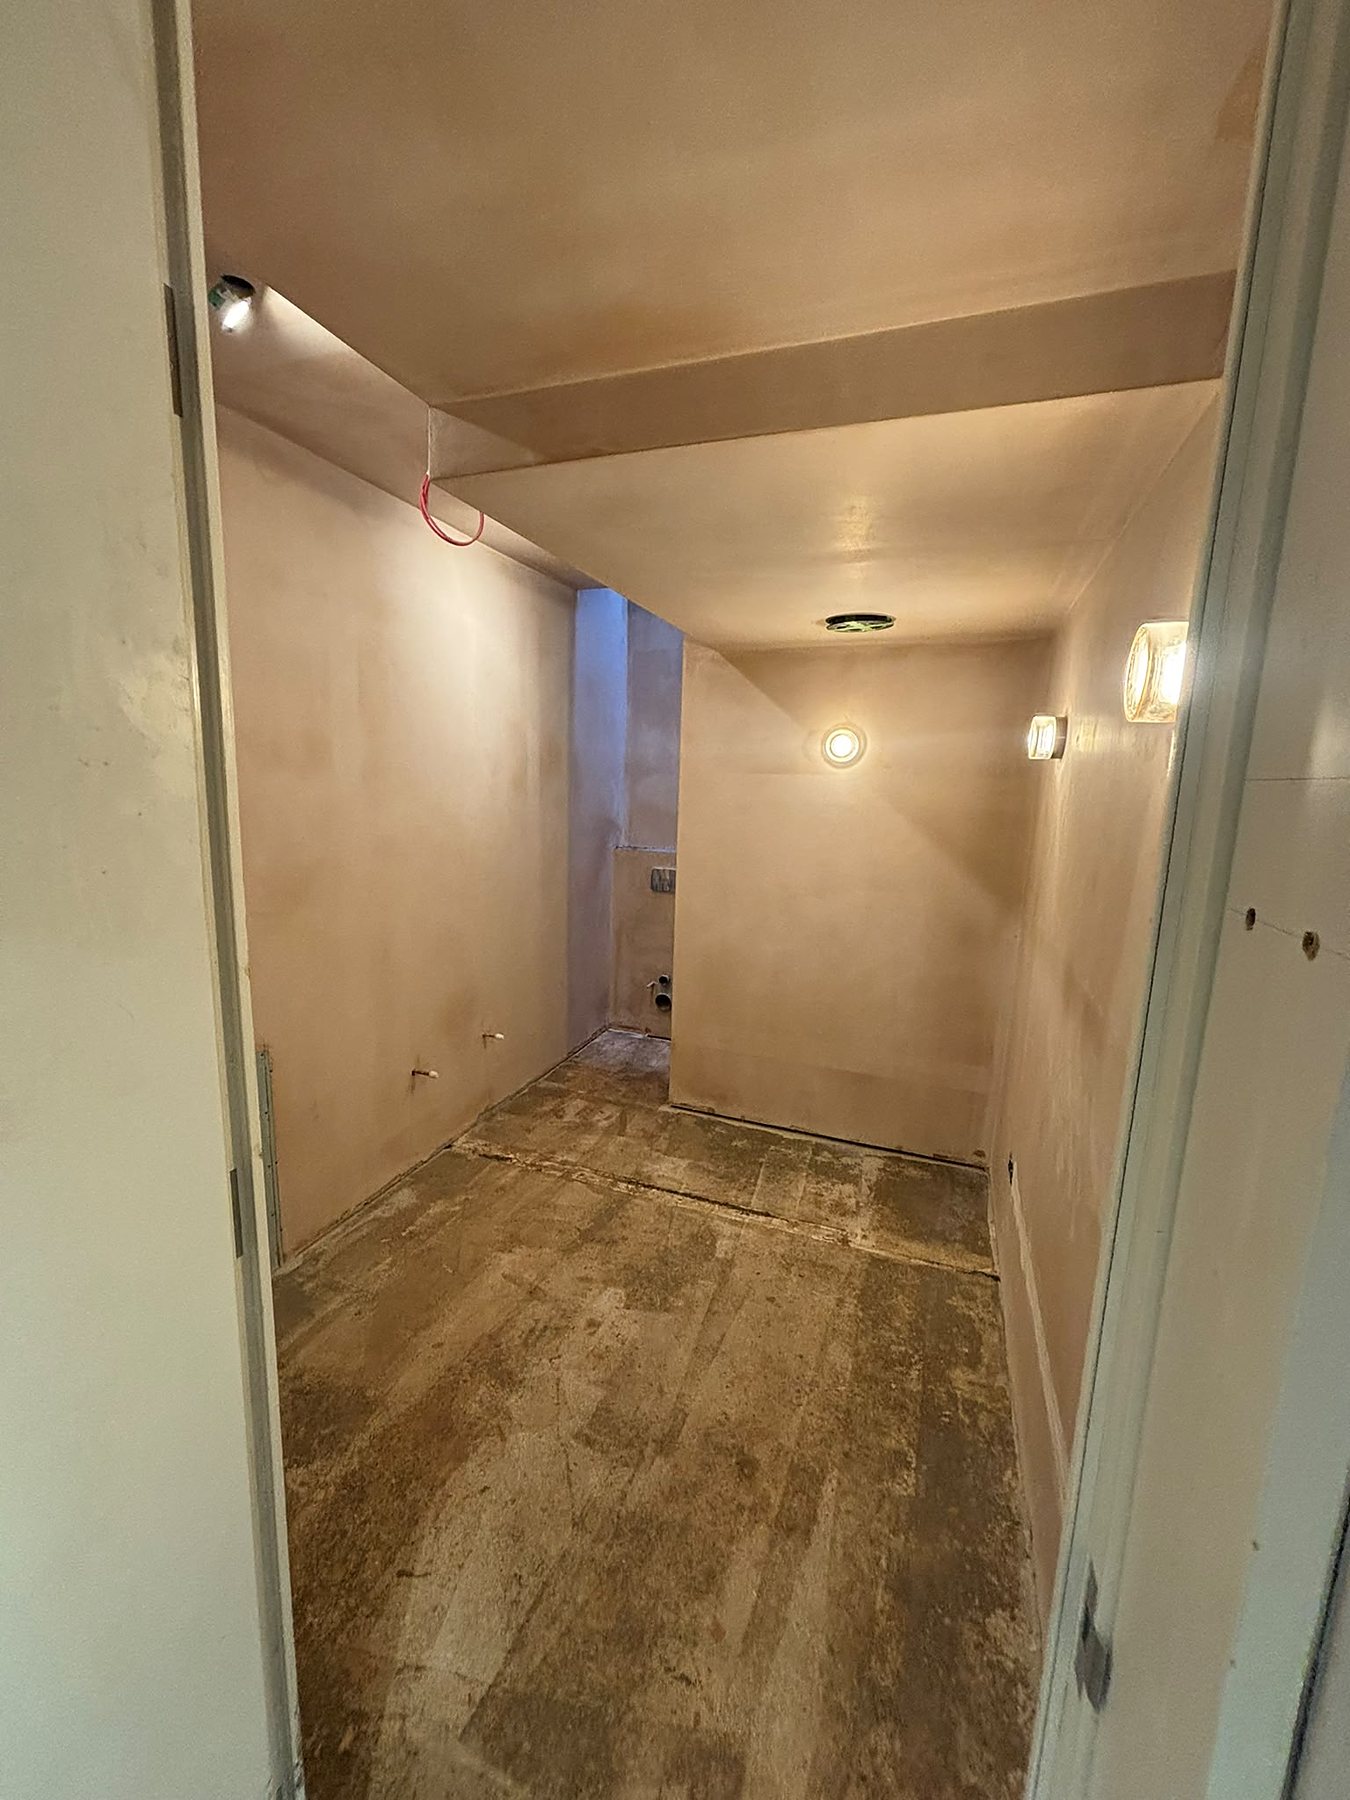
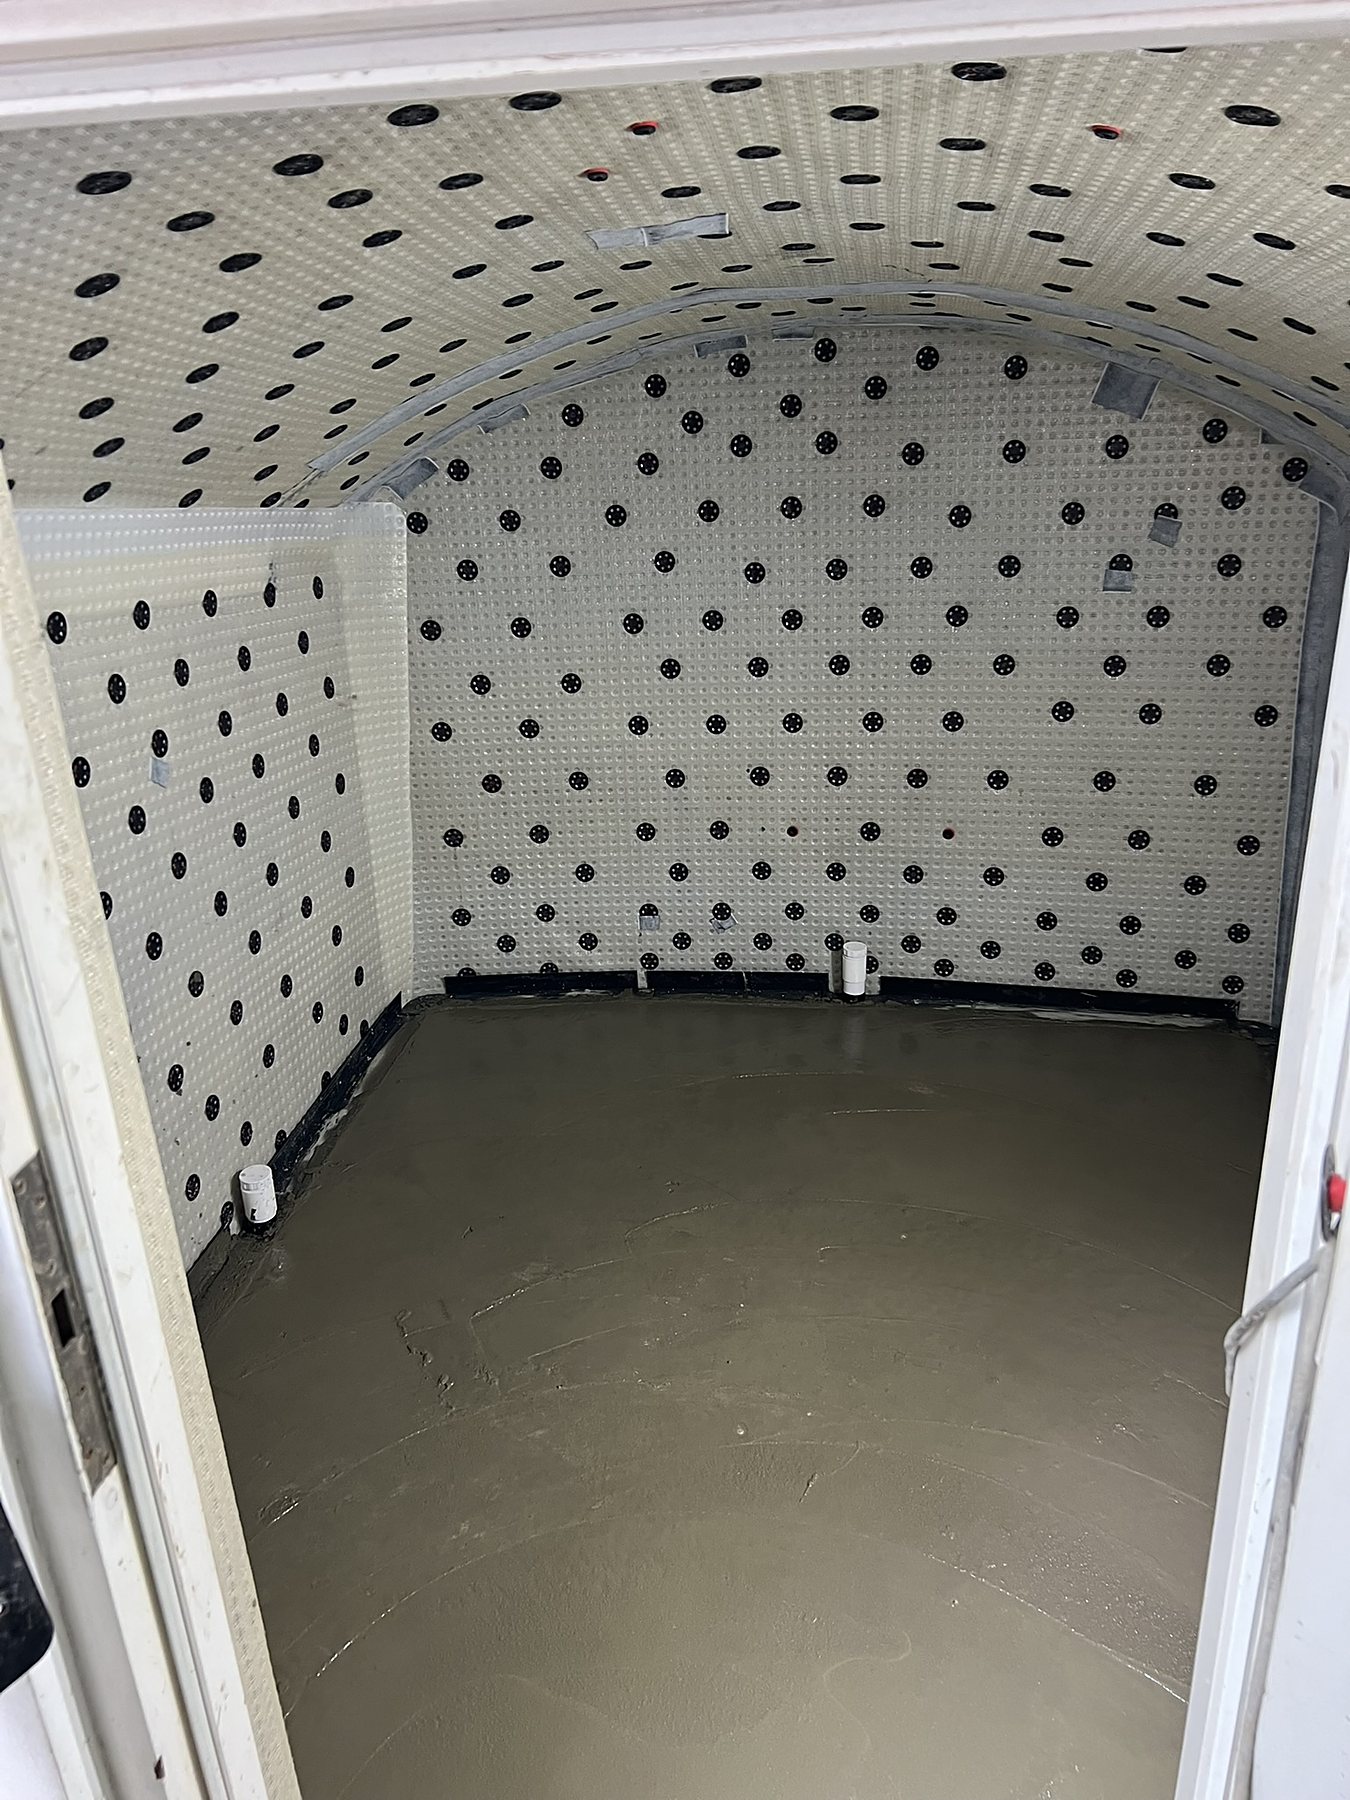
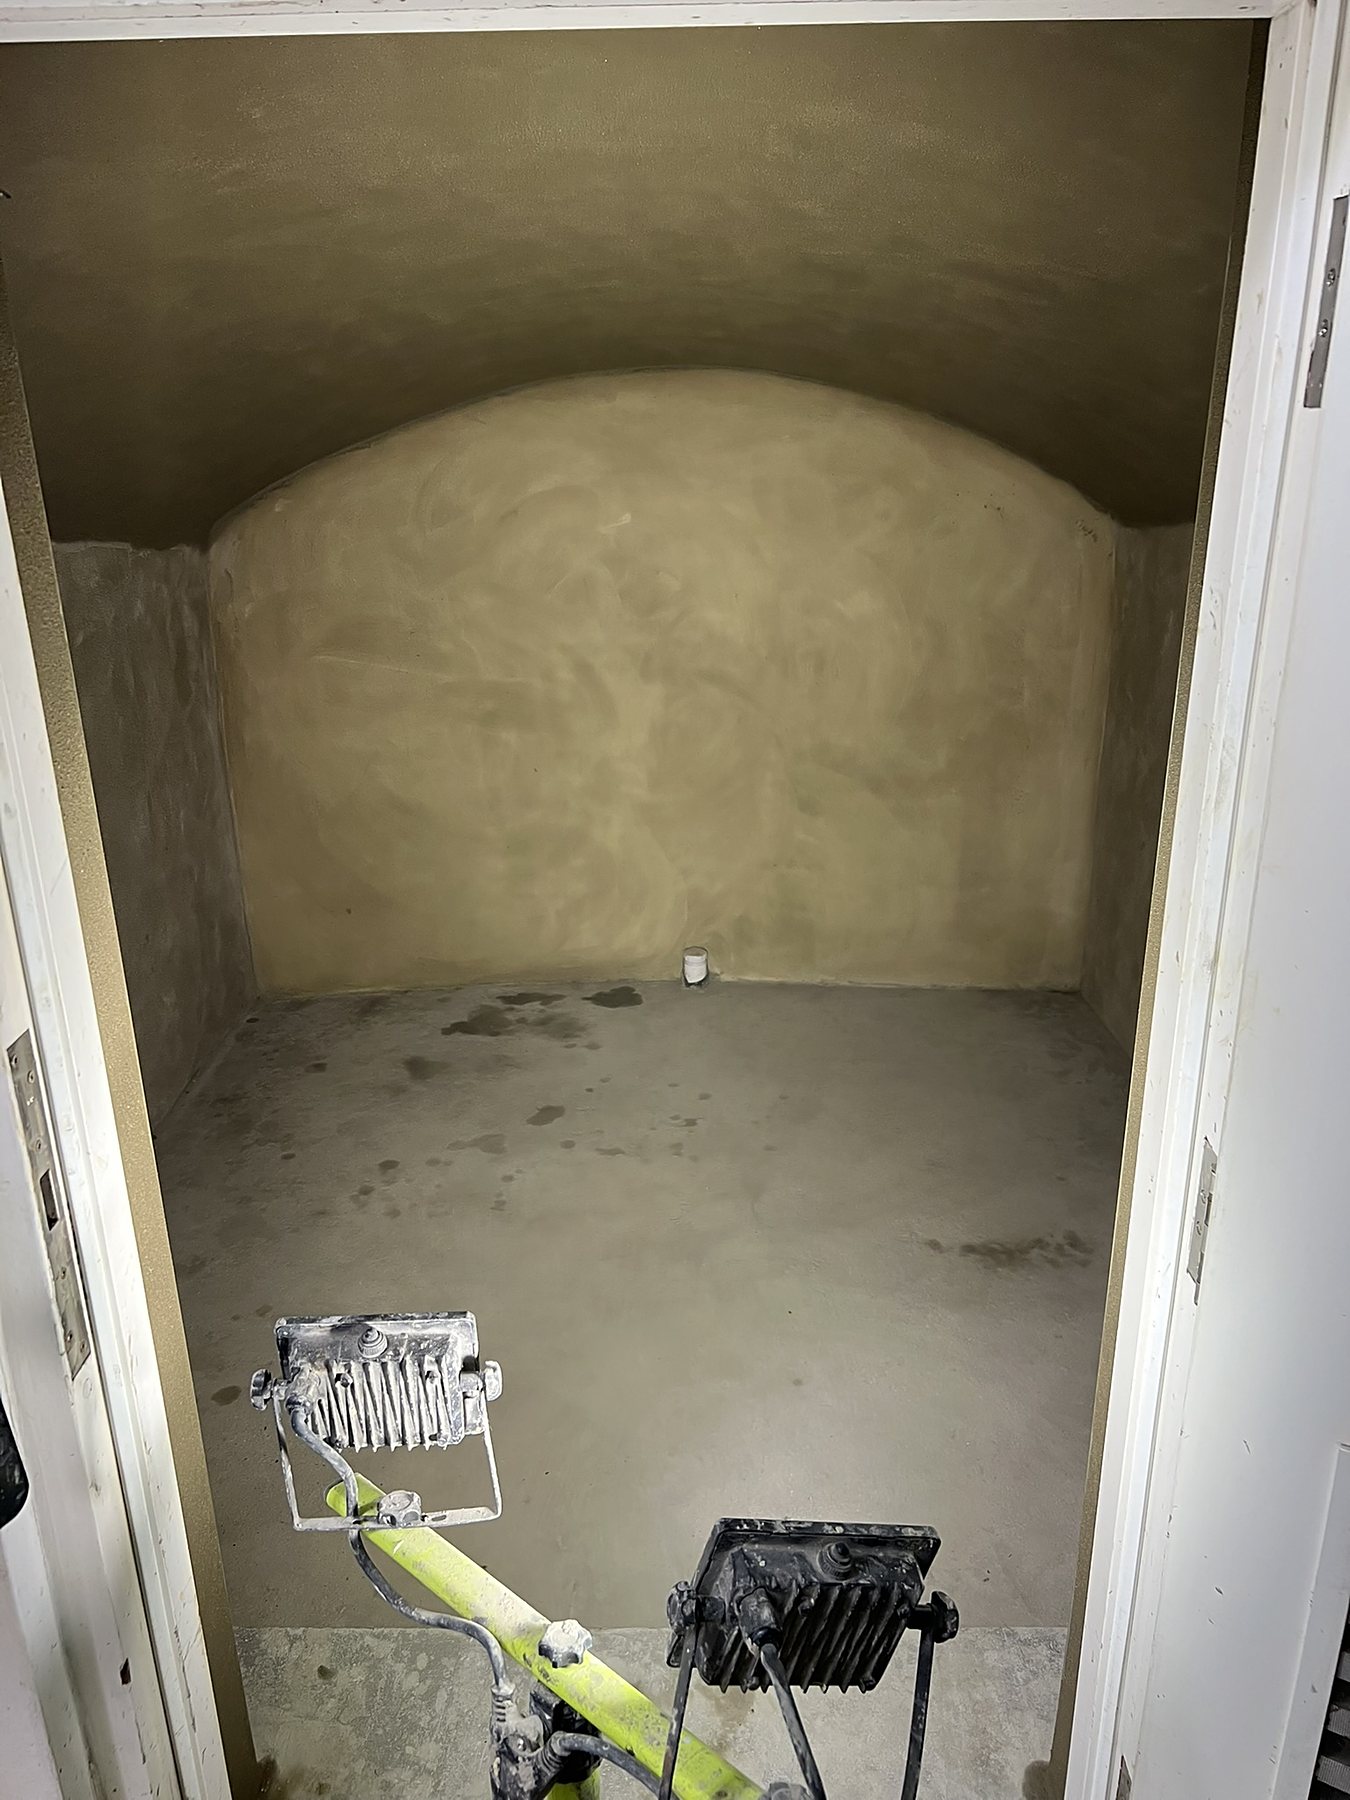
Protect the membrane: ordinary screws must not pass through the finished surface and membrane into the wall. A puncture can let water through. Attach shelving to the plywood, battens or frame instead of the wall behind.
Step 8
Step 8: Handover and maintenance
At handover, we provide our 10-year workmanship guarantee and a QANW Insurance Backed Guarantee, which can pass to a new owner when you sell. We recommend servicing the system twice a year to keep it working over time.
See our installations
Drainage, sump and pump installations
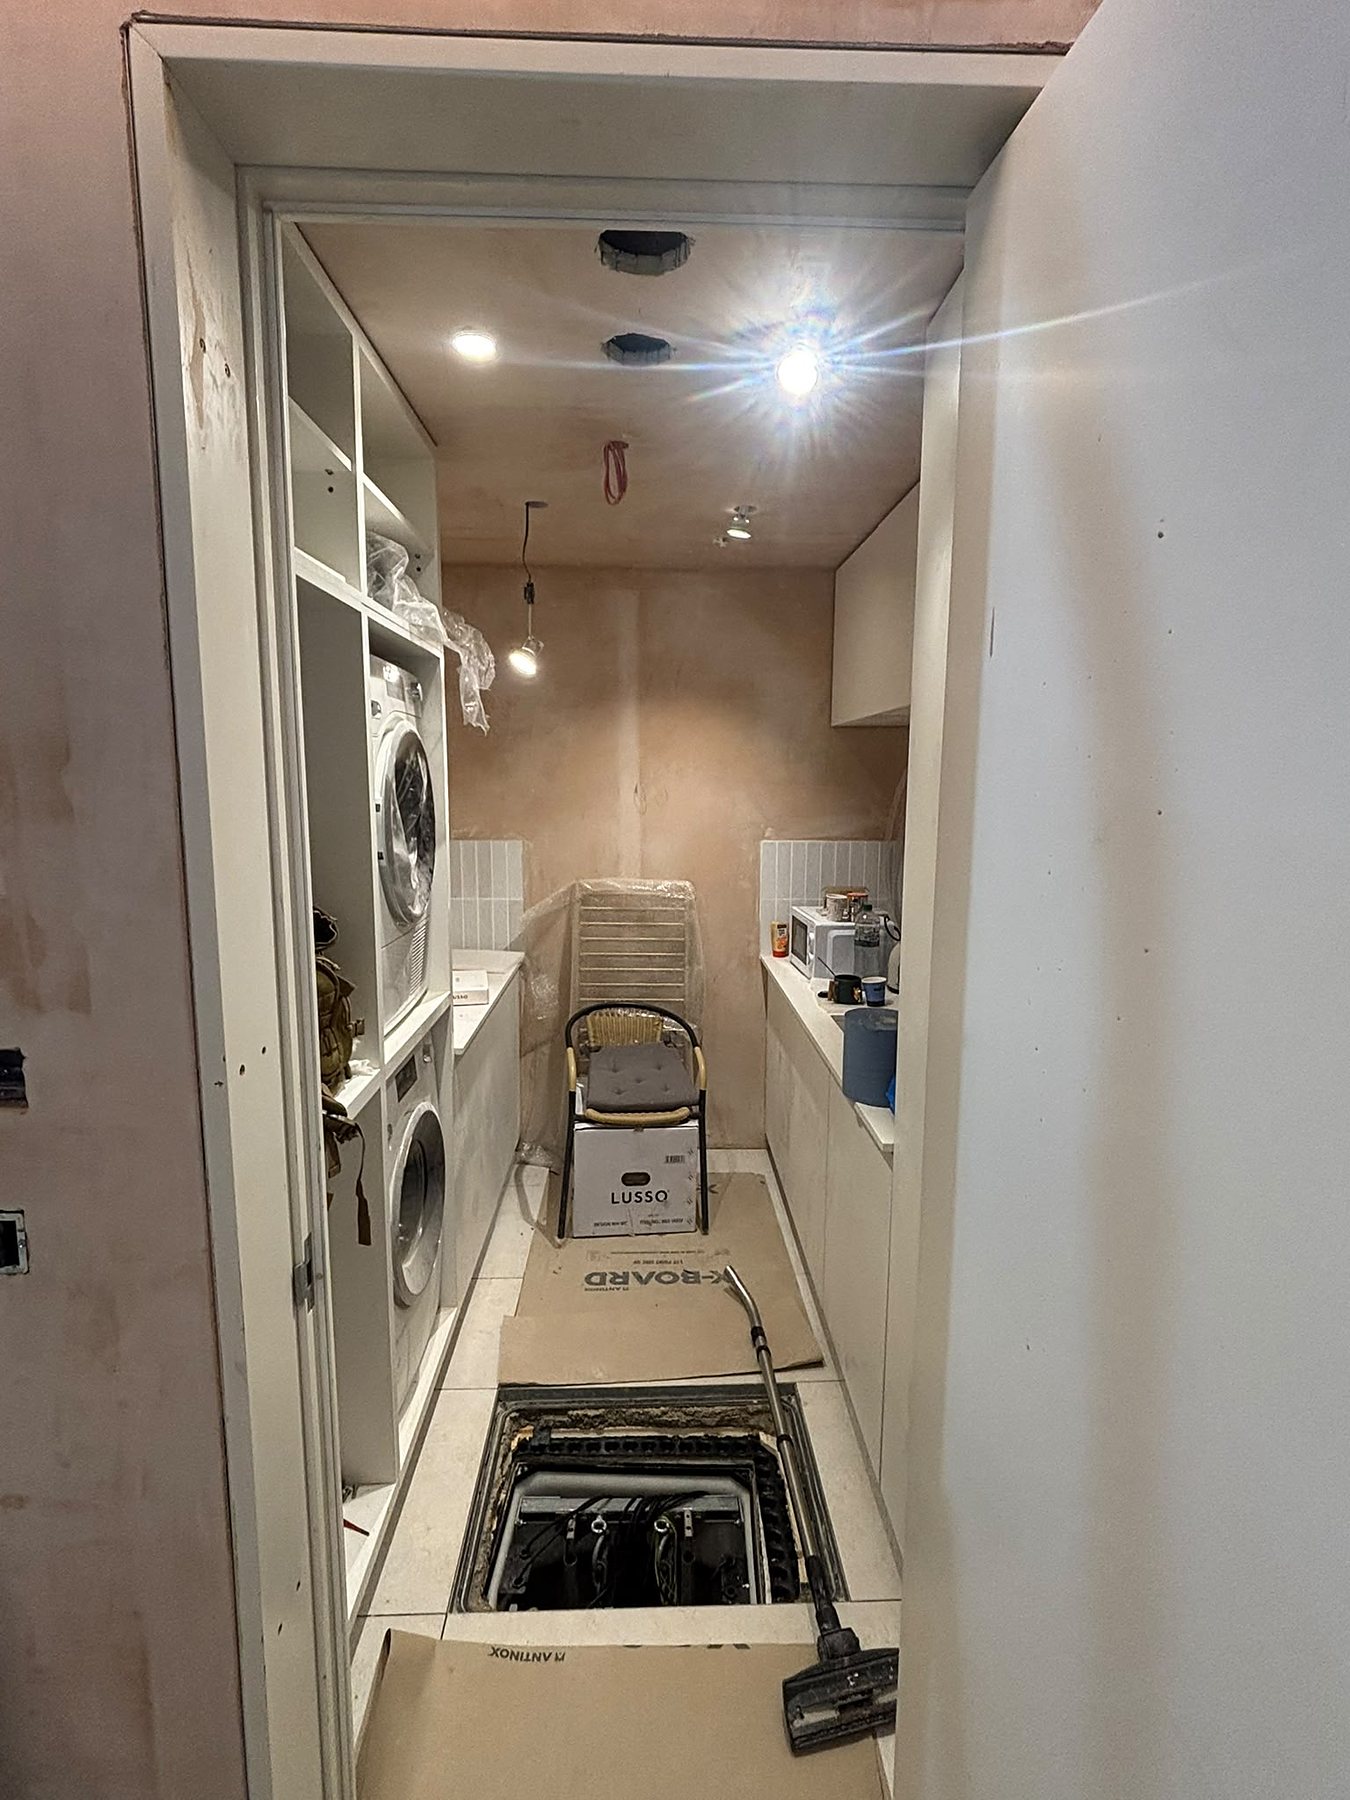
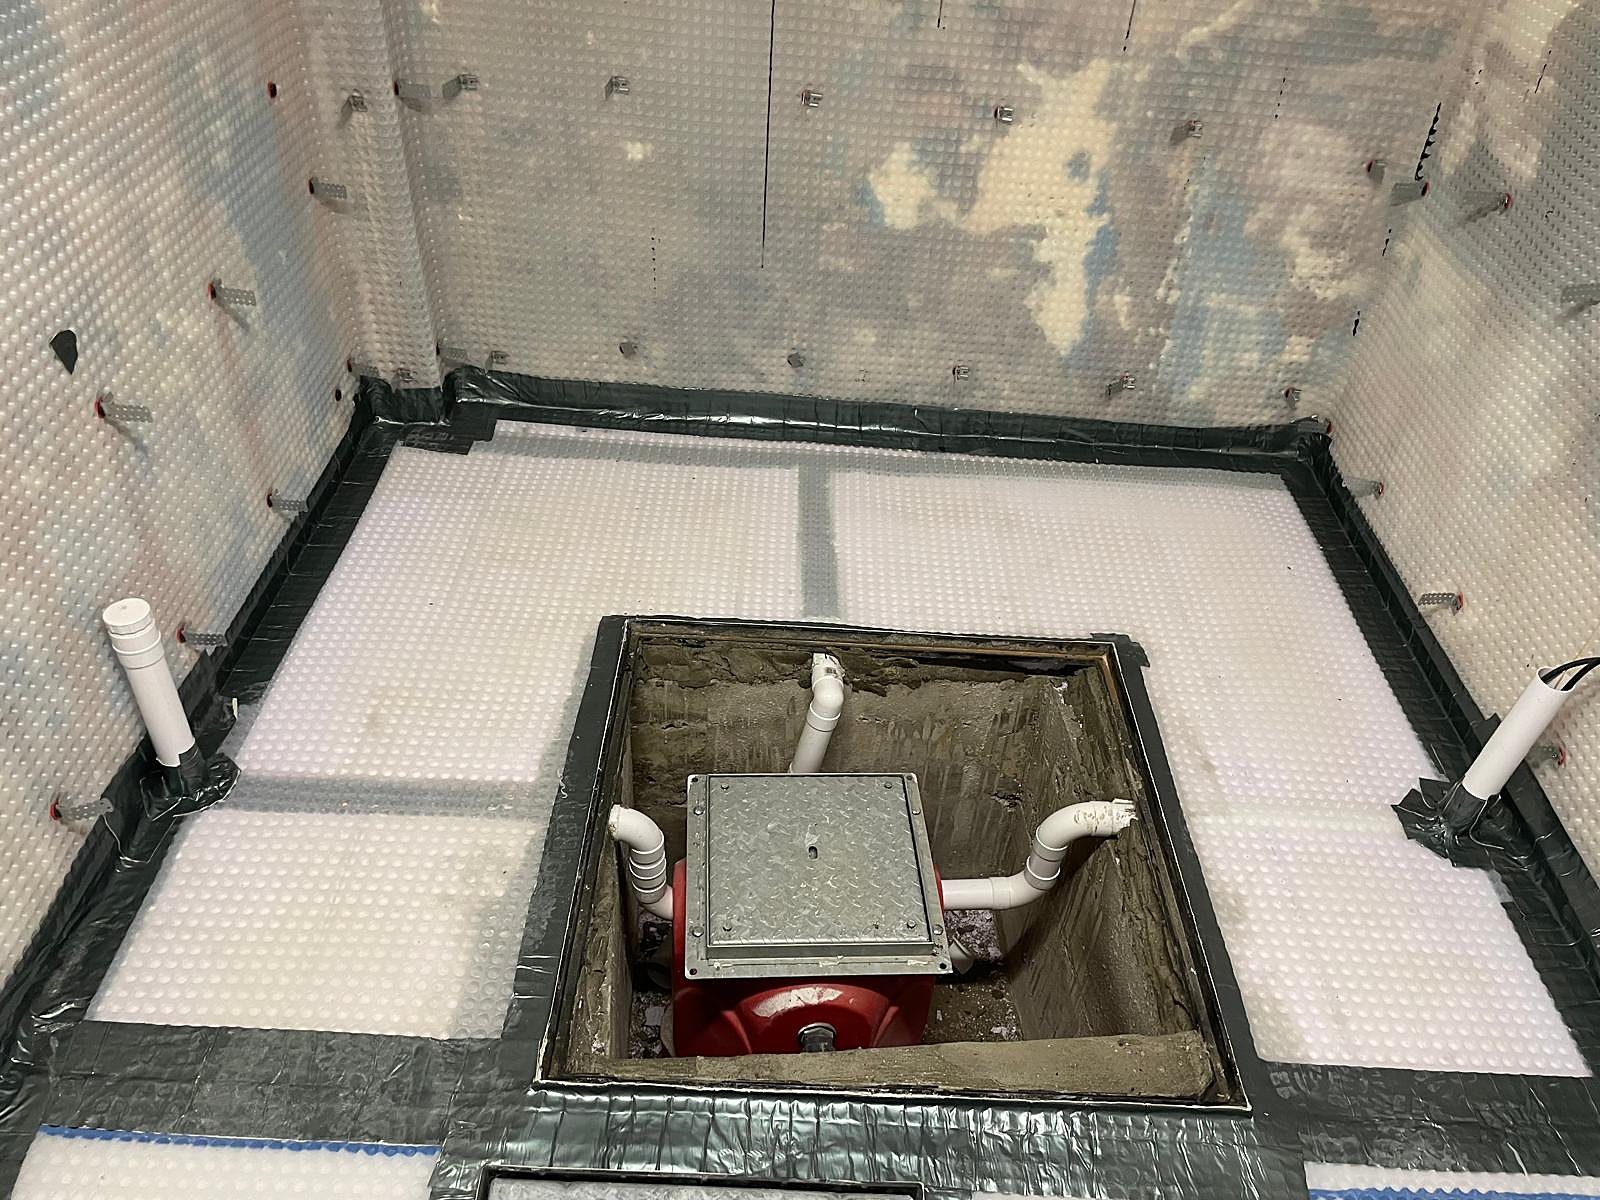
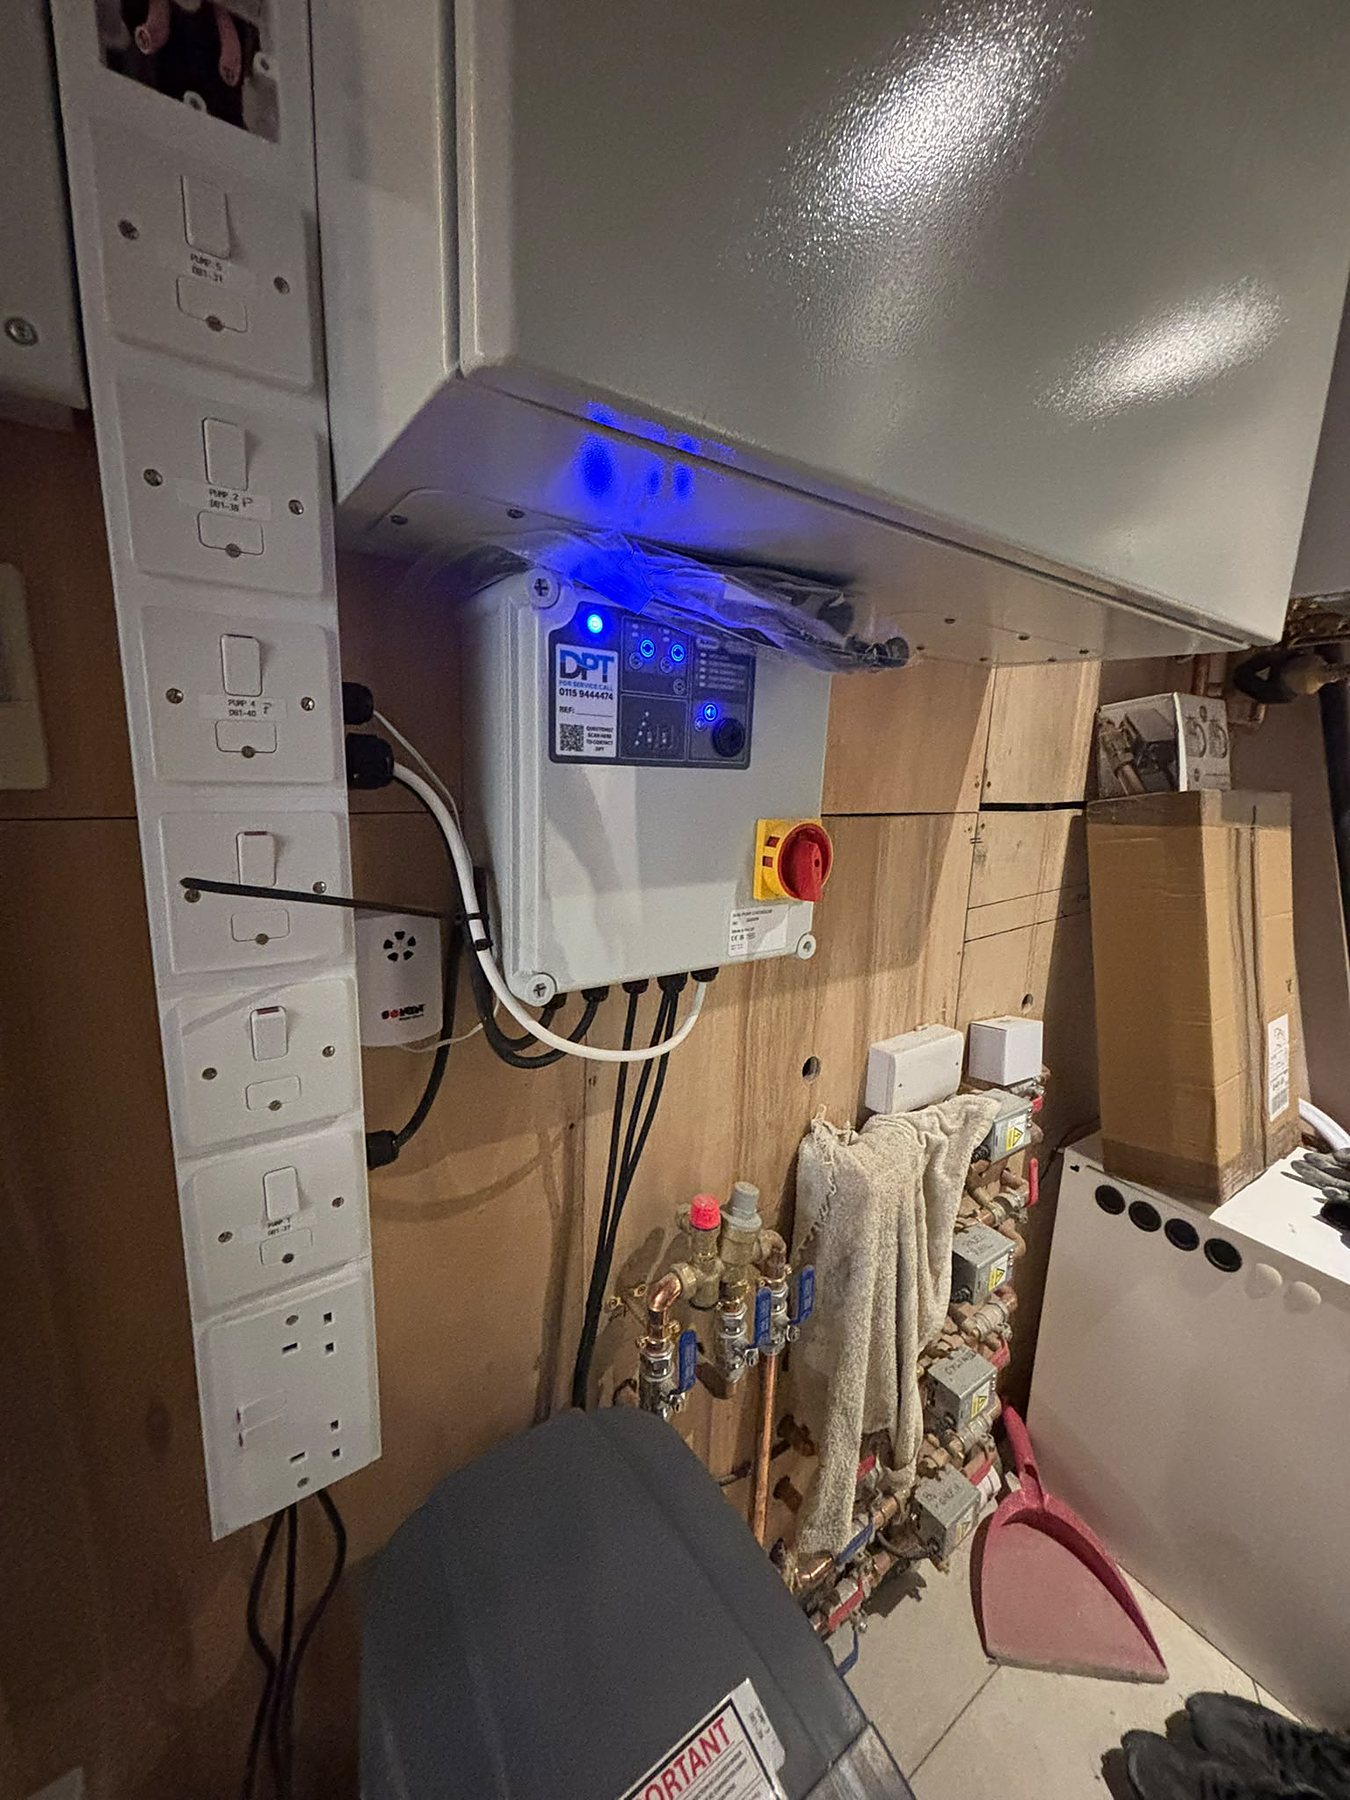
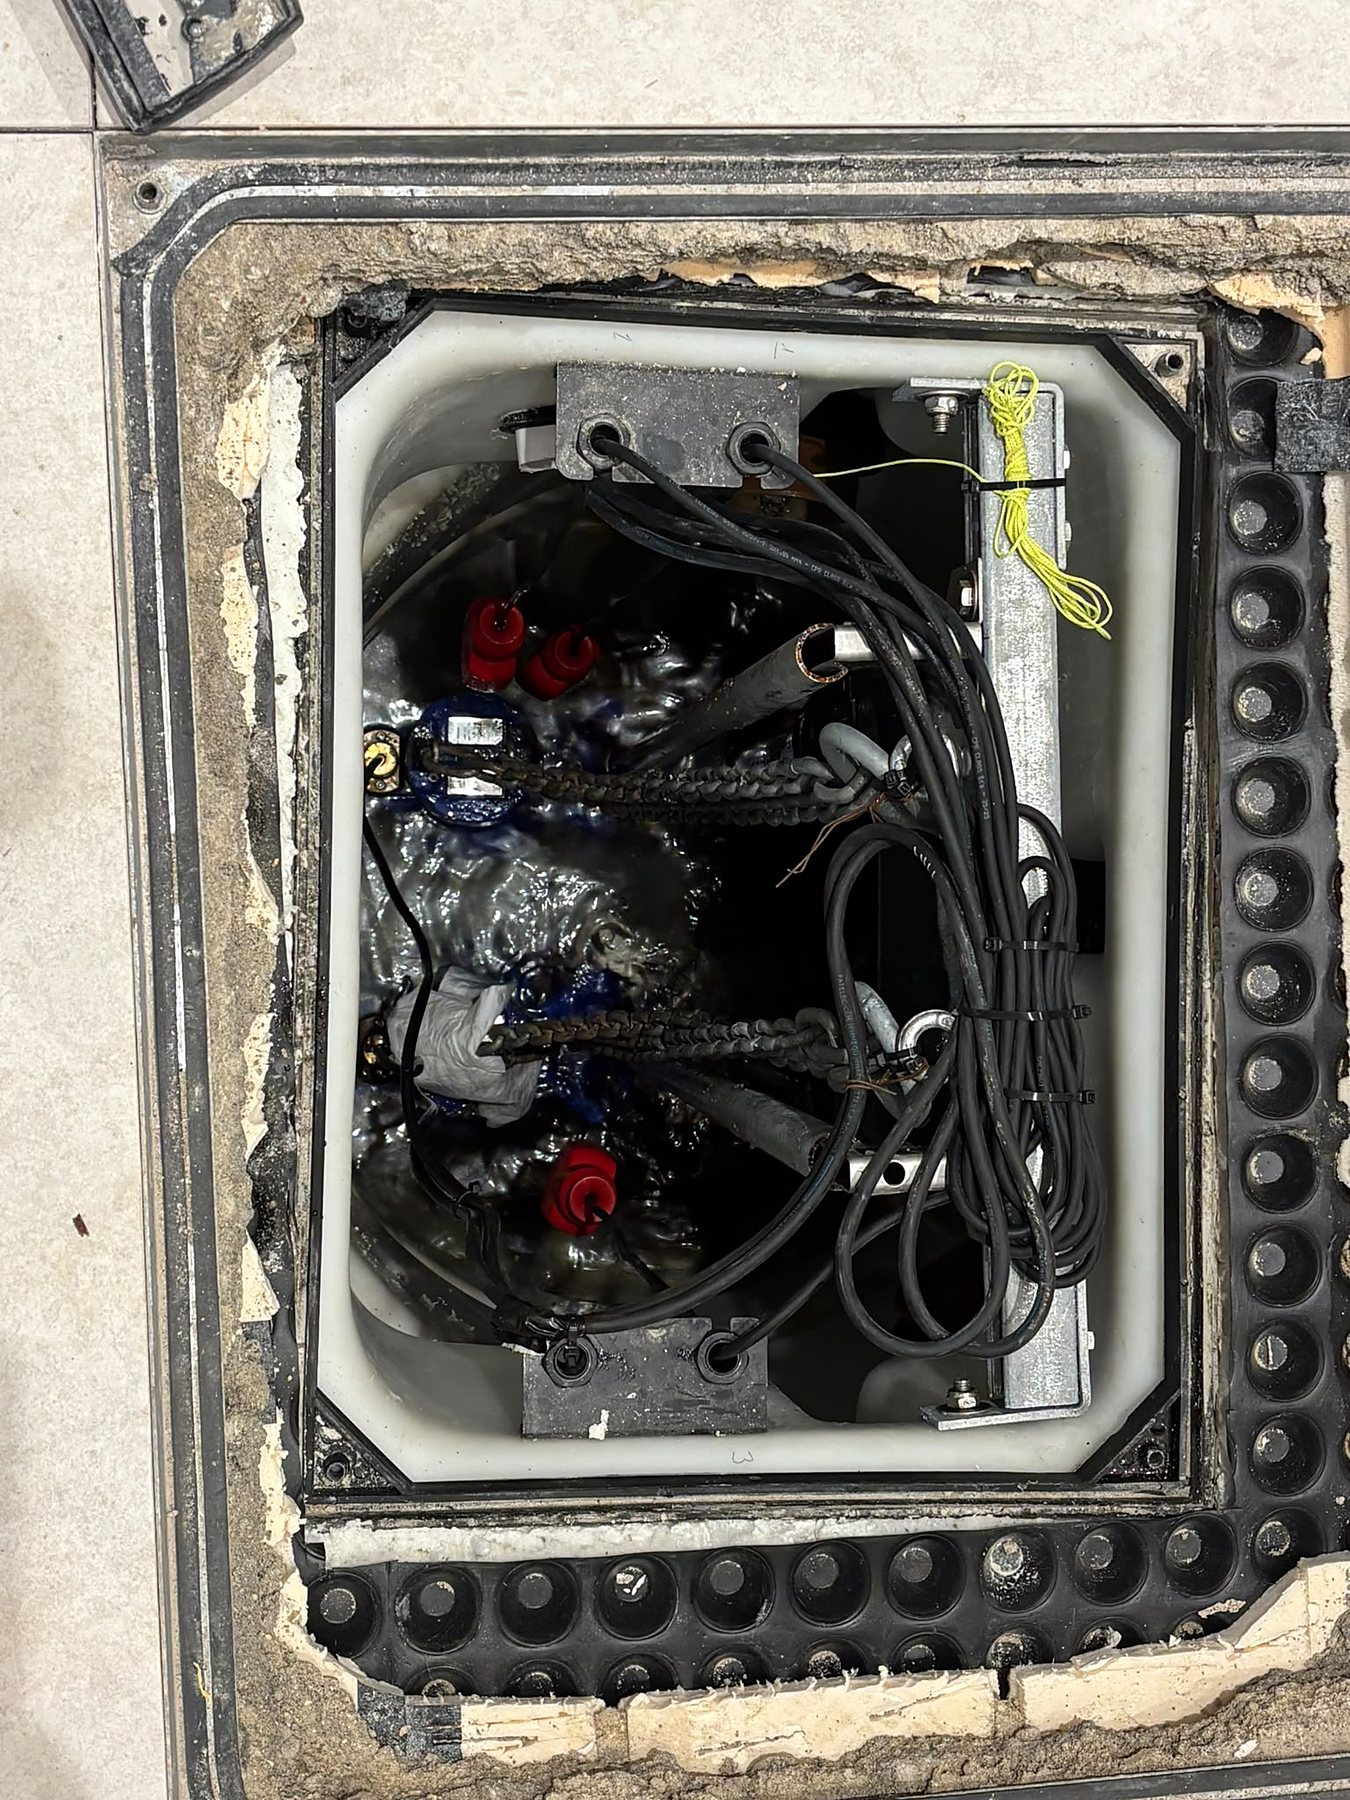
The drainage and pumps described in step 6 are central to the system. The photographs show channels running towards a sump, an alarm-equipped control panel and twin pumps housed in a sealed chamber.
Systems from Wykamol
Our cavity drain membranes
As an approved Wykamol installer, we primarily fit the Wykamol cavity drain membrane system.
Performance and lifespan: these membranes are watertight when tested at 60 kPa for 24 hours and operate from −50°C to +80°C. The manufacturer states that their life expectancy matches the lifetime of the structure. Within a complete Type C system, they provide a dry Grade 3 environment for living spaces under BS 8102.
| Membrane | Where we use it |
|---|---|
| 8 mm studded membrane | Walls, floors and vaults: our standard membrane |
| 8 mm heavy-duty membrane (700 g) | Over floor insulation, high-traffic and commercial areas; also a radon barrier |
| 8 mm mesh membrane | Walls to be rendered directly or finished with plasterboard |
| 3 mm membrane (plain or mesh) | Where space is tight, window reveals, damp-proofing |
| 20 mm floor membrane | Floors with a high water inflow: the highest drainage capacity |
Where a membrane system can be installed
- basements, including basement conversions,
- cellars finished with plywood that can support shelving,
- pavement vaults finished with mesh membrane and waterproof render,
- new basements of Type B waterproof concrete, adding a second line of defence,
- underpinned basements where dry-pack joints may develop cracks.
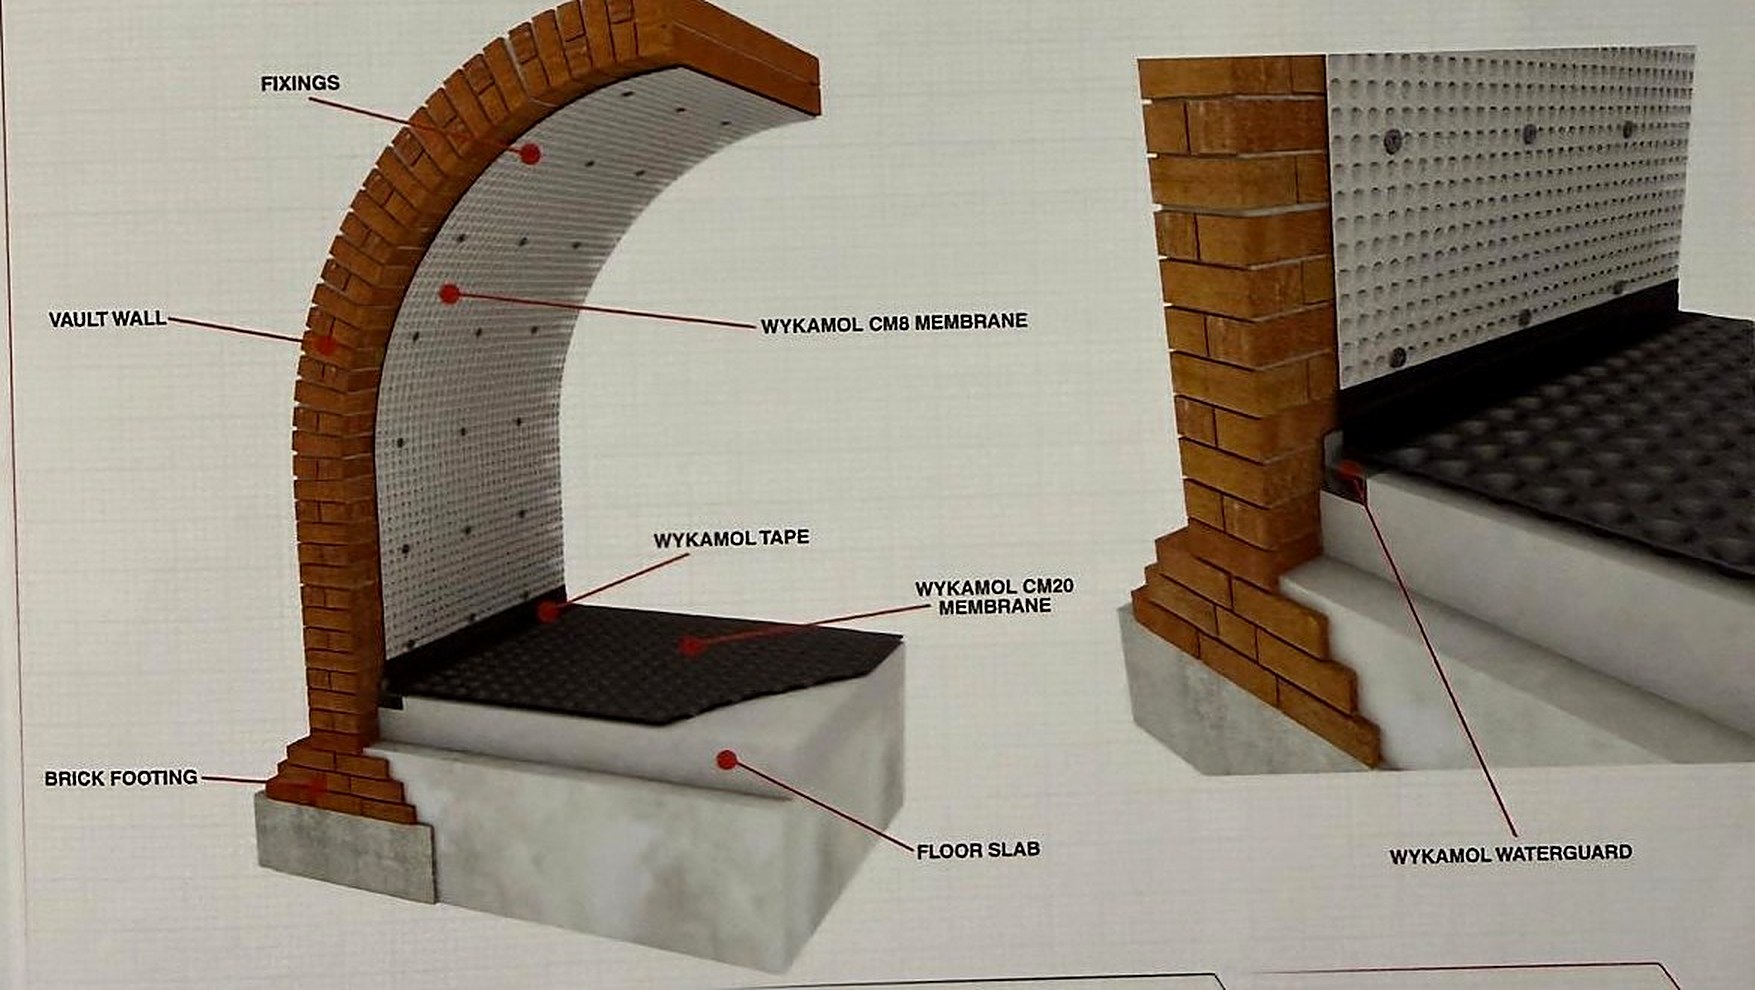
In the drawing, a membrane follows the brick vault and joins the floor membrane with tape above a drainage channel at its base. Drawing: © Wykamol Group
Common membrane installation faults
We are frequently asked to correct membrane work carried out by other contractors. Problems we encounter include:
- shelf fixings driven directly through the membrane,
- membrane joints left without a sealed overlap,
- membranes fitted without channels or a pump to remove collected water,
- channels without ports for inspection and flushing,
- wall membranes placed beneath screed despite not being designed to support it.
A project in progress
A substantial basement in Notting Hill
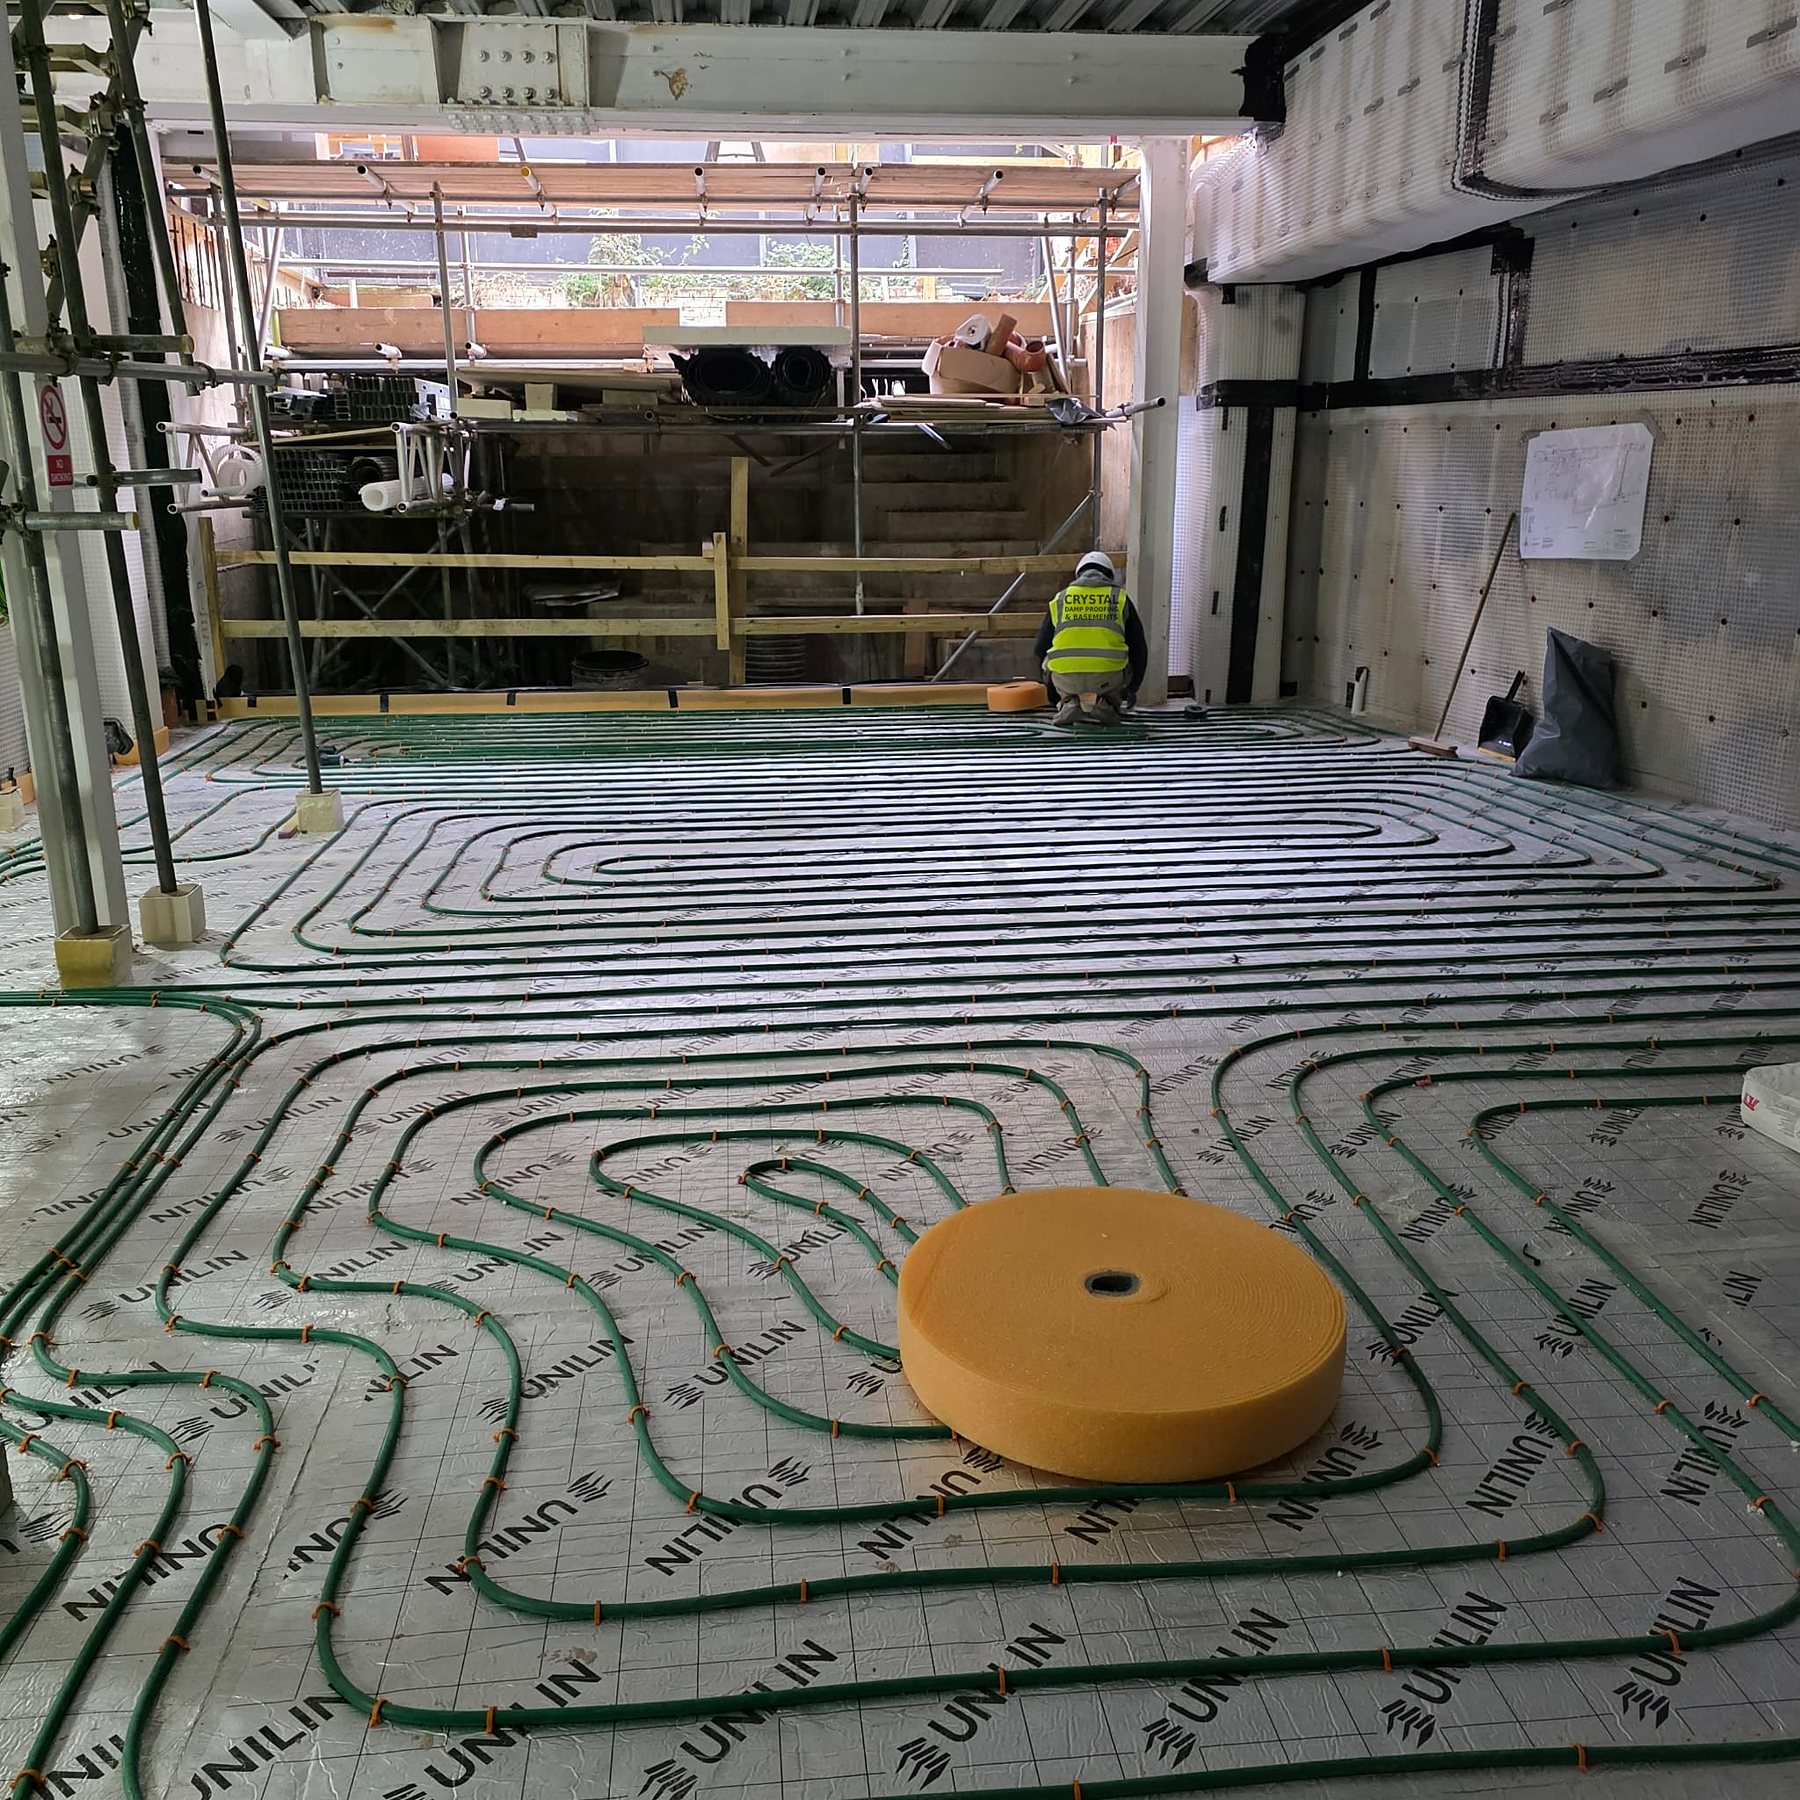
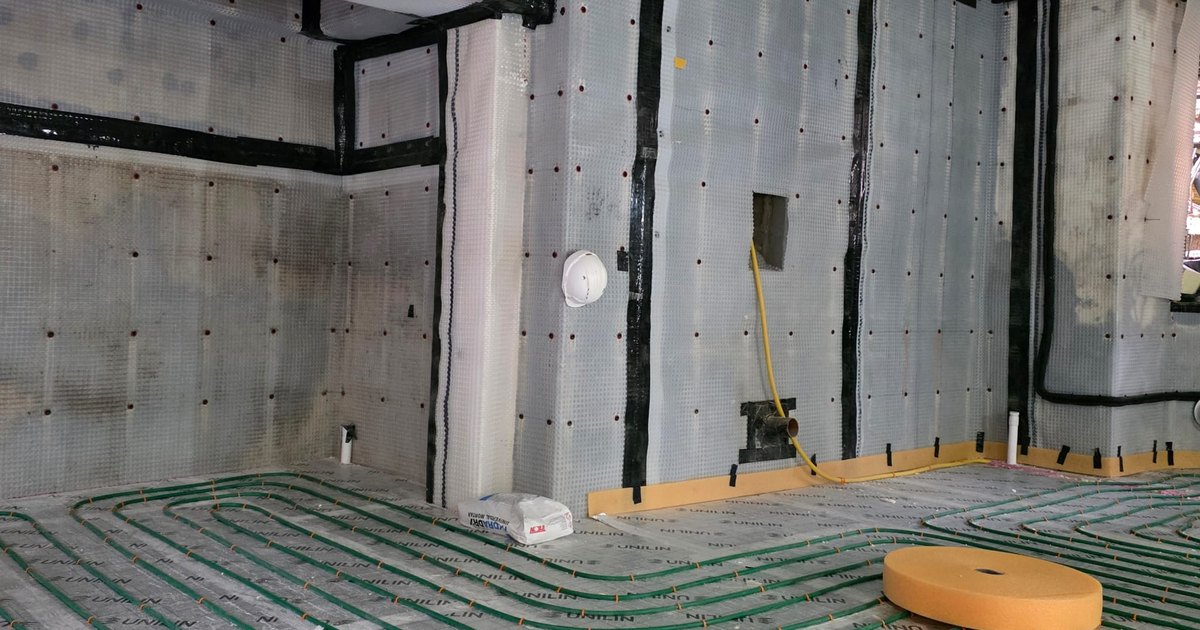
For a current large basement project with underpinning in Notting Hill, we installed Type A, B and C waterproofing designed to work together following many meetings with the architects.
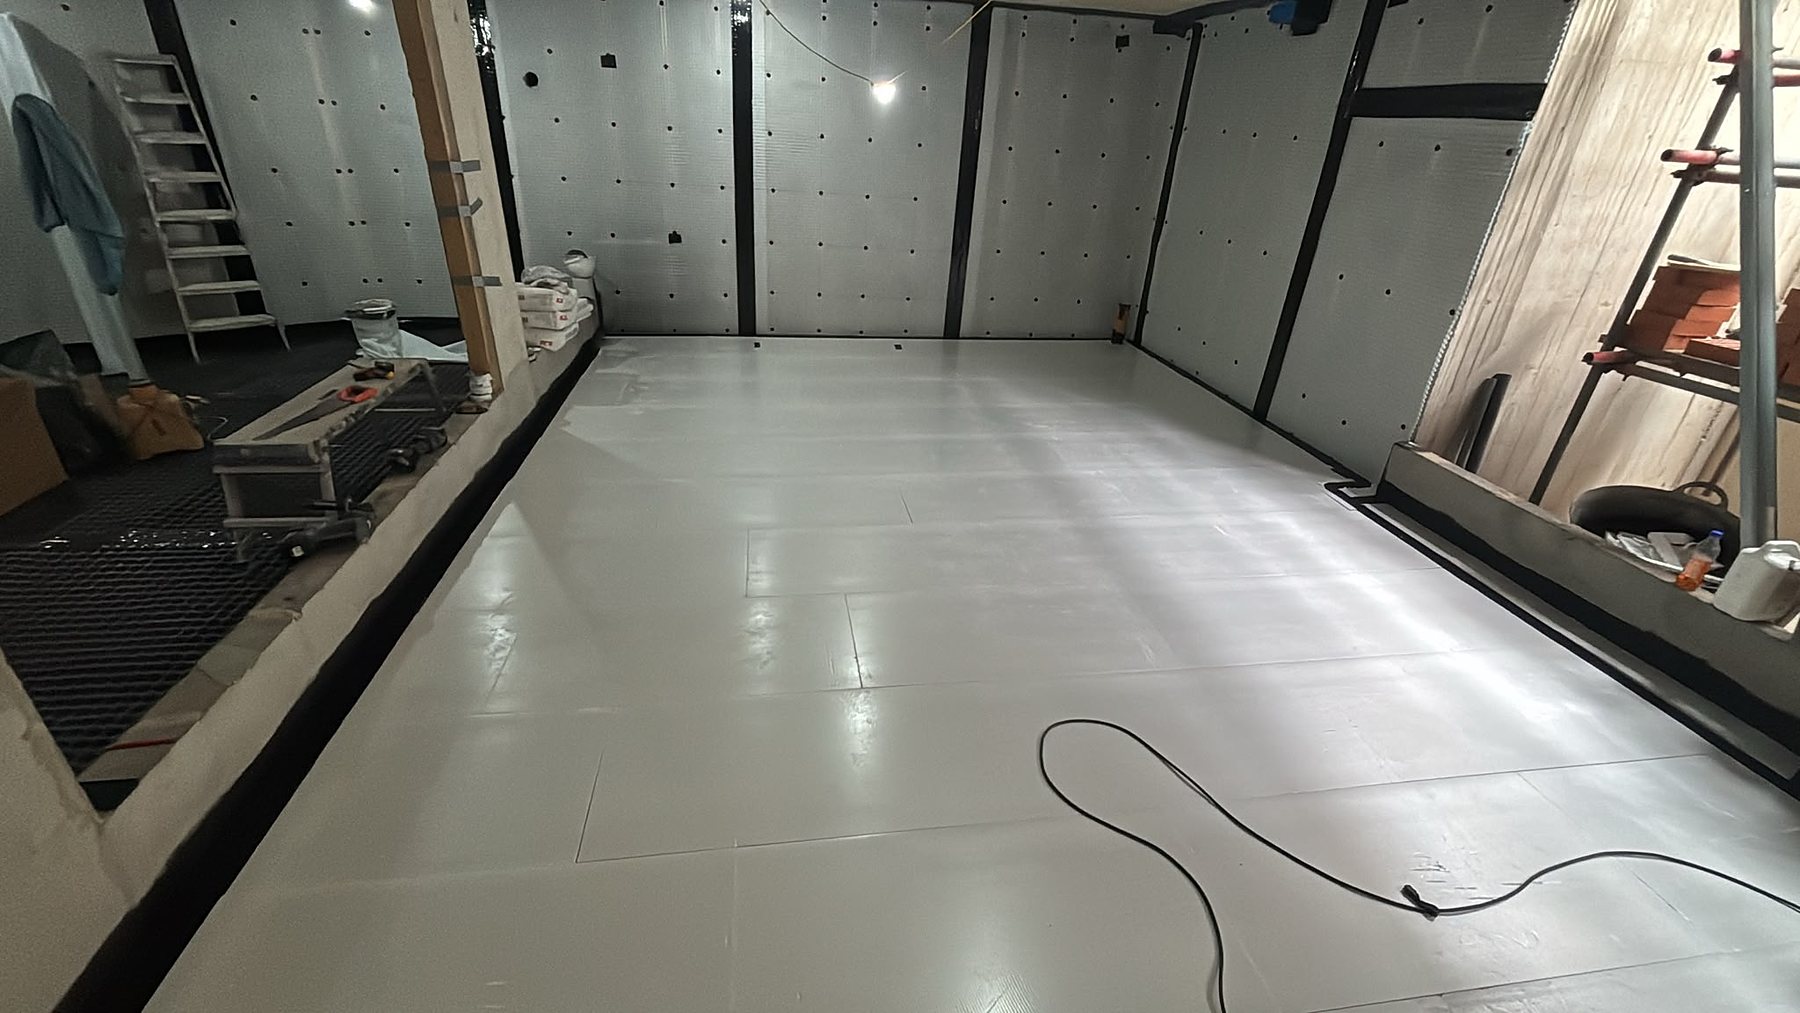
Its cavity drain floor membrane is installed and the screed is being laid. Our basement tanking page has more information.
Related basement services
Services that complement the membrane
A membrane works as part of a dry basement system. These related services can be used alongside it, with every installation supported by our 10-year guarantee.
Basement Tanking
Survey-led choice of Type A, Type C or a combined approach.
Sump Pump Systems & Services
Installation and servicing of twin pumps, alarms and battery back-up.
Basement Waterproofing
Waterproofing systems for damp or flooded basements.
Cellar Waterproofing
Cellar waterproofing with a plywood finish for shelving.
Vault Waterproofing
Vault finishes using mesh membrane and waterproof render.
Basement Floor & XPS Insulation
Insulation beneath the membrane for warm, dry floors.
Our materials
Manufacturers we work with
Our main cavity drain membrane, drainage and sump system comes from Wykamol; we also use products from Delta and Newton. We are an approved installer for Wykamol, Delta and Biokil.

Wykamol
Membranes alongside tanking slurries and sump pumps.

Delta
Studded membranes with drainage channels and pumps.
NEWTON
Newton
Membranes for cavity drainage and associated pump systems.
Your questions
Tanking Membrane for Basements: FAQs
Can shelves be fitted to a membrane-lined wall?
Yes. Fix them to the plywood, battens or frame in front of the membrane, rather than screwing through it into the wall.
Does the membrane smell or make noise?
No. It sits behind the wall finish. The pump runs only when it needs to remove water, and the sump lid is sealed.
Is a pump needed in every basement?
Most basements need one to remove water collected behind the membrane. If gravity drainage is possible, a pump might not be necessary; we establish this during the survey.
How long can a membrane system protect a basement?
With correct installation and servicing, it can protect the basement for many years. Our work includes a 10-year guarantee and a QANW Insurance Backed Guarantee.
Should I choose a membrane instead of tanking?
That depends on the conditions. A membrane is the safer option where water presses in, walls have cracks or the room will be lived in. Tanking alone may suit stable walls with mild dampness.
When should the system be serviced?
We advise servicing twice a year to flush drainage channels through the jetting eyes, clean the sump and test the pumps.
How can I arrange a membrane survey in Beckenham?
Book online or speak to our specialists on 020 8432 3350 or 07720 752231. Surveys beyond 10 miles from our base are charged in line with our price list.
Free consultation
Arrange a basement membrane survey in Beckenham
Water entering your basement or plans to make it a living space? Contact us for a free consultation or survey. Surveys beyond 10 miles from our base are charged according to our price list. Speak to our specialists on 020 8432 3350 or 07720 752231.
07720 752231
Tell us what is happening in your basement
Please complete all fields marked *. We will get in touch after receiving your details to arrange the survey.
What we assess locally
Wet basements around Beckenham: what we check first
For a basement in Beckenham, the building itself tells us more than assumptions about its neighbourhood. Whether it is a cellar, a vault or a space being converted, we inspect it before deciding how a membrane system should manage incoming water.
We identify entry points and check for water passing through walls or floors, along with cracks and salts. We also consider where the sump and discharge pipe could sit and how the room will be used. These observations shape the membrane, drainage and pump design.
Managing incoming water behind dry walls and floors
We value every completed project and are proud of our 5-star Google rating. Use our Booking Survey section to arrange a survey, or speak with our specialists on 020 8432 3350 or 07720 752231.
Qualified Specialists & a 10-Year Guarantee
Our family-run team holds CSSW qualifications, with a minimum of 10 years’ experience each. We back our work in Beckenham with a 10-year guarantee covering workmanship, plus a QANW Insurance Backed Guarantee that transfers to the new owner if you sell your property. Based in Croydon, we work on domestic and commercial properties across London and the South East.

See What Our Clients Say
We are proud of our 5-star Google rating. Book a survey in our Booking Survey section, or call our specialists on 020 8432 3350 or 07720 752231.
Our service areas
Basement tanking membranes near Beckenham
For homes in Beckenham and surrounding areas, including Penge, Sydenham, South Norwood and Bromley, Crystal Damp Proofing & Basements Ltd installs basement tanking membranes. Select an area below for its local page.